Poses in Unreal 4
A little article about poses in UE4 and how to use them.
What’s a pose?
A pose is like an animation with exactly one keyframe. Like an animation it stores positions of bones and values of curves, but just one position per bone and one value per curve. Also, like an animation it can be additive. On the other hand, a pose is controlled by a curve, exactly like morph target.
For example, suppose we have few bones that move eyelids. We then can have a pose “Eyes Closed” which stores eyelid bones rotations to have eyes completely closed. Then we can apply it at 100% to have eyes closed, or we can apply it to 50% to have eyes half closed. We can also interpolate between 0% – 100% – 0%, so the character will blink. We can decide that it is an additive pose, so it will add on top of other animations, like walking and blinking at the same time.
Pose files
Each pose don’t have an individual file, instead many poses are stored in the same file called Pose Asset. This is handy to group poses by function or body part, like face poses, hand poses, full body poses and so on.
Additive settings are applied on the level of the pose asset, so all poses in the asset have the same additive setting.
Naming poses
As poses are driven by curves their names are defined in curves namespace, the same namespace morph targets use. So you can’t have a pose and a morph target share the same name. Poses can be renamed inside Pose asset file. If you have a list of pose names (one per line) you can rename multiple poses at once. First copy the list of names to the clipboard (Ctrl-C in a text editor), then in Unreal Right click on a pose > Paste all pose names. It will rename the pose you clicked on plus the poses below using the list of names you copied before.
Creating poses
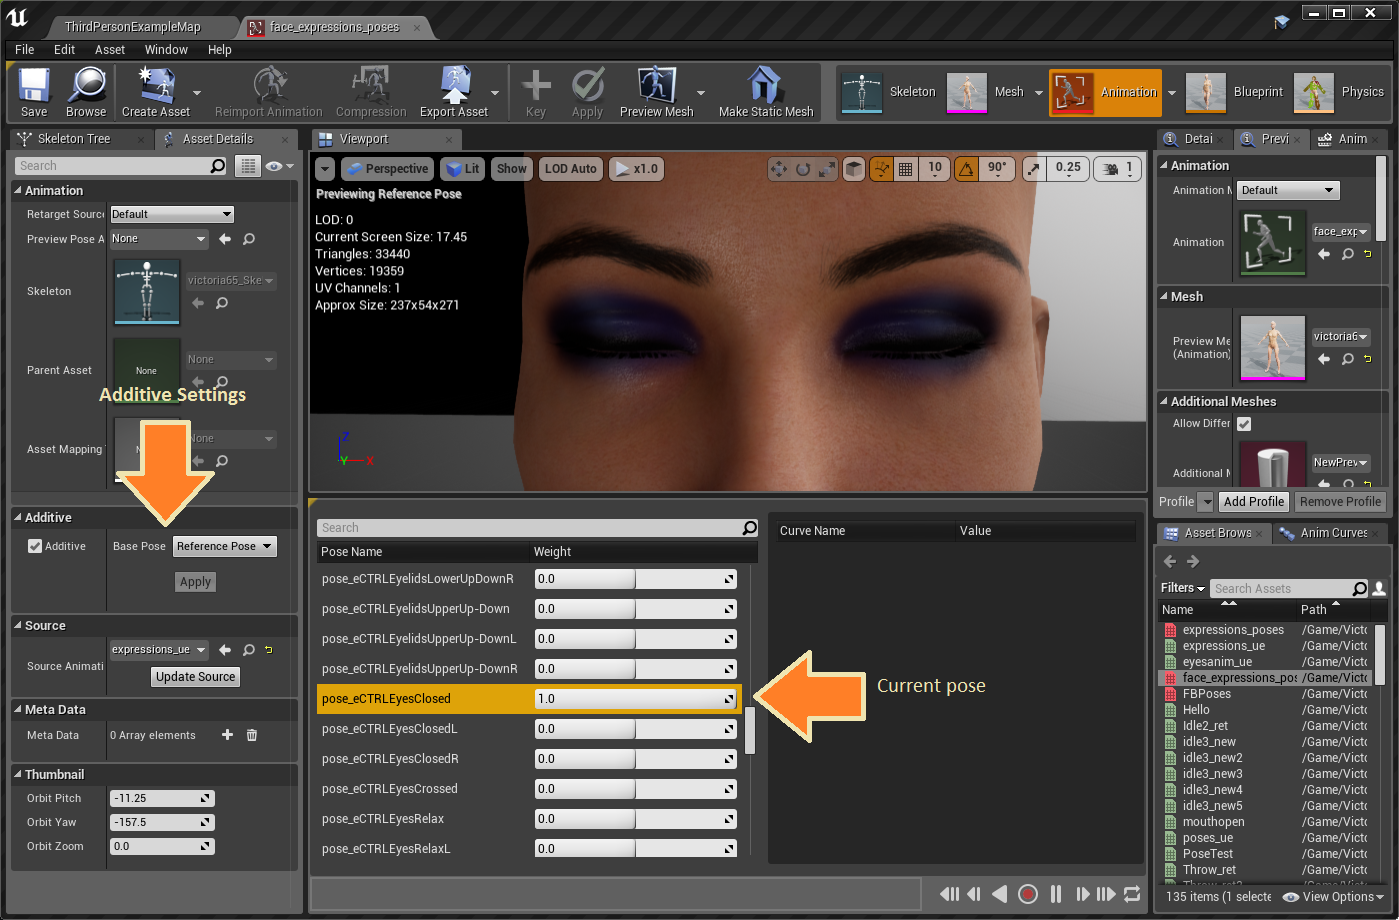
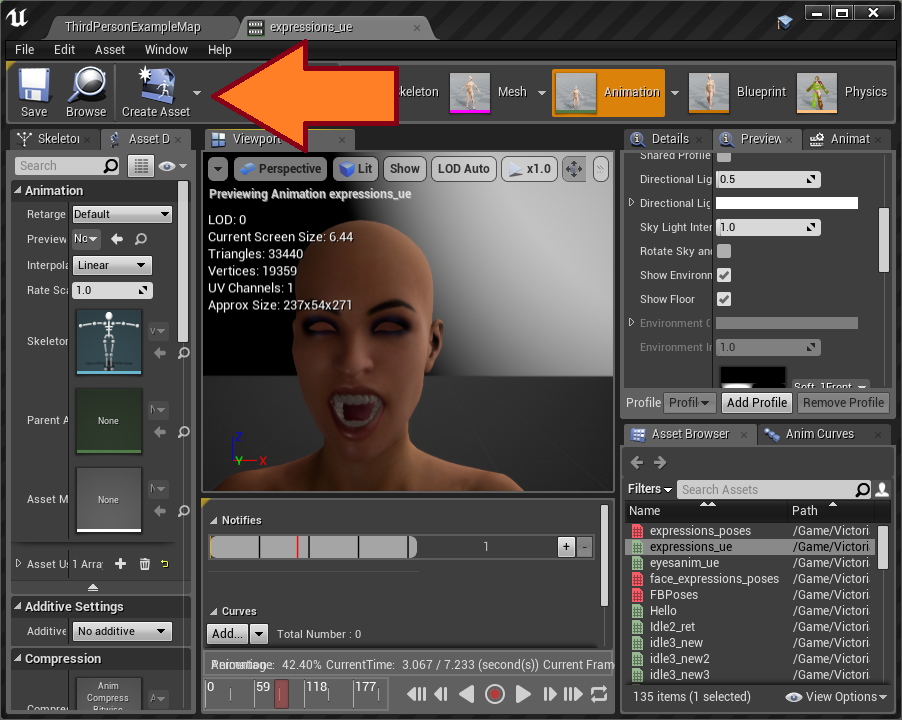
Poses are created from animations. When you have an animation opened in editor, you can create a single pose from whatever pose your animation is currently in (including manual adjustments), or you can bulk create multiple poses from every keyframe in the animation. You can also add poses to the existing pose asset. In all cases you use “Create asset > Create pose asset” button.
Using poses
As already said poses are driven by curves, like morph targets. So, to use a pose we need to create a curve. There are few ways of doing so.
Create curve in animation
Take an animation or create a new one (in which case you need to add some frames by right clicking on the timeline and choosing “Insert frame” option).
Click the “Add..” button under “Curves”, then “Add Variable Curve” and chose your pose name, in this case “EyesClosed”.
In order to be able to see the effect add your Curve Asset file as Preview Pose Asset.

Now you can animate Eyes Closed pose using keys on the Curve and create a blink animation.
Evaluate poses in anim blueprint
As you can imagine, the animation we just created only animates the value of a float curve called “EyesClosed”. There is another step you need to do to see eyelids moving. You should evaluate the pose, that means replace the value of the curve by the actual position of the bones. This is done in the anim blueprint using “Evaluate pose asset…” node. Type the name of your Pose Asset in “Add node” popup and choose “Evaluate “. Then plug your blinking animation as input.
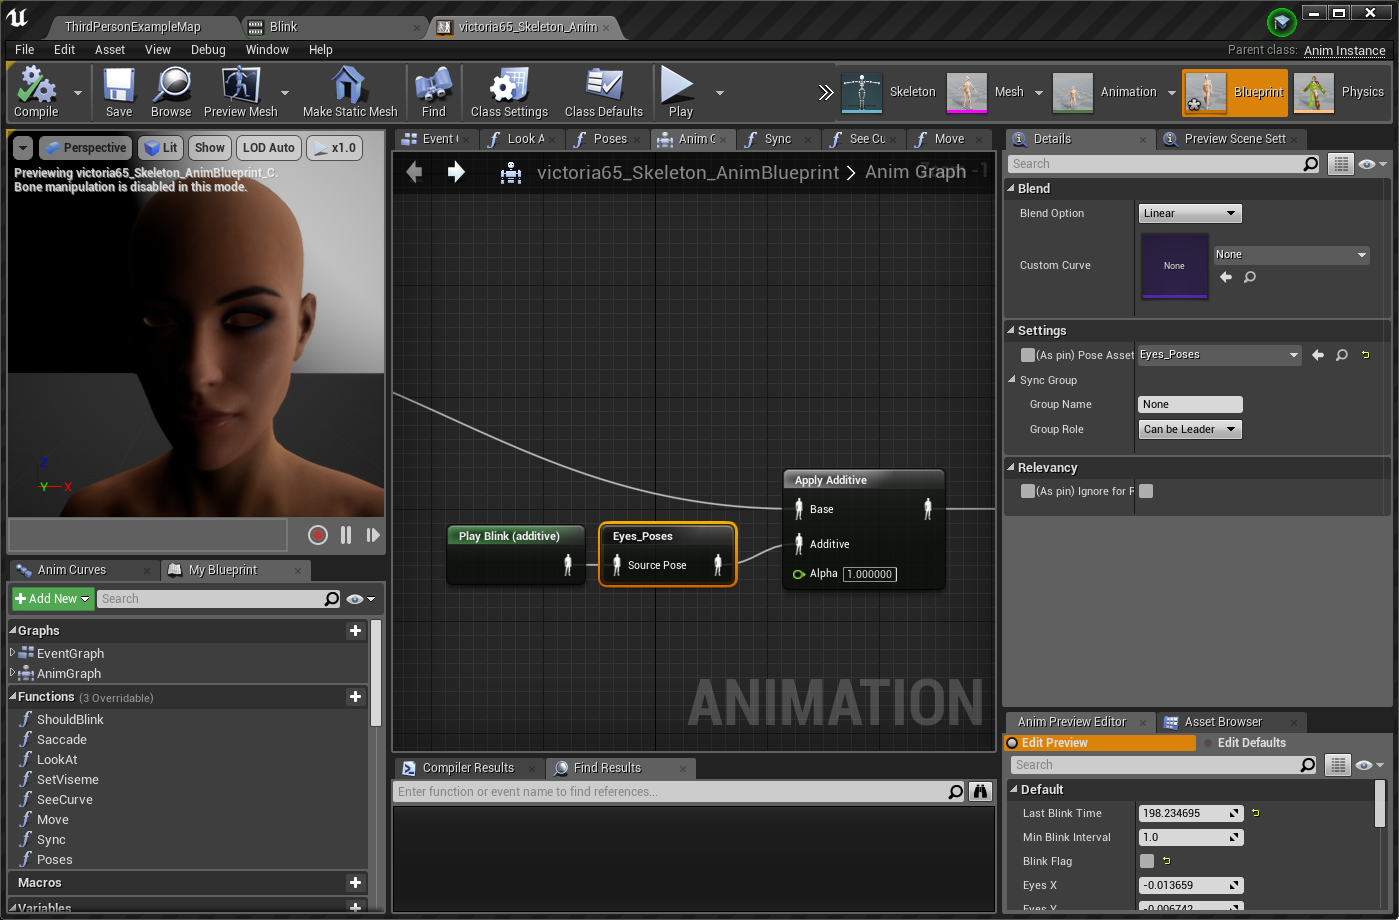
In the picture above we evaluate our additive blink animation we created then insert it into whatever is played before by using “Apply additive” node. This way the character will be continuously blinking like mad. Of course, if your pose is not additive you don’t need the Apply Additive node at all.
“Evaluate pose asset” node is also called “Pose blender”.
Convert to pose by name
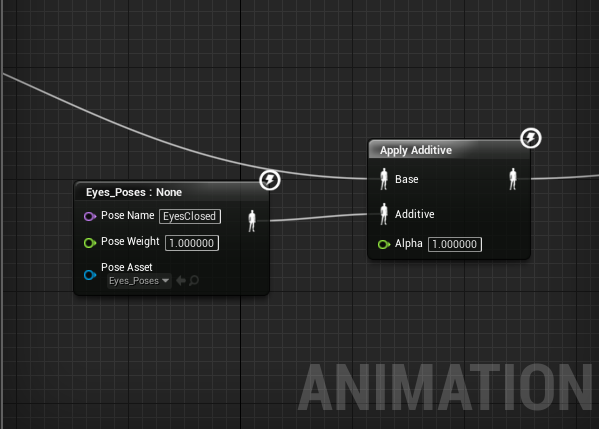
There is a – somewhat hidden – way to play a selected pose directly from pose asset, without creating an animation. For doing so, right click on the “Evaluate pose” node and choose “Convert to pose by name”. Now you can choose which pose from which asset you play. Of course, it will not animate, so the character will simply have their eyes closed all the time. If you want to reproduce the blink animation you need to do something else like animate the weight.
That’s it for poses in UE4!
There is also an article about importing poses from Daz3D: Export all eCTRLs as animation and import as poses(Daz3D to UE4)
Just wanted to say ‘thanks’, because this solved my issue. The feature is indeed quite hidden and without your post I would have never found it 🙂
Cheers