Using Photogrammetry in SpeedTree 9
In this post I’m going to show how I create a tree in SpeedTree 9 using the new cool features it offers for photogrammetry.
First, for this example, I decided to make a birch, more precisely a Japanese white birch (Betula platyphylla), a tree I need for my Unreal 5 “Shinsengumi HQ” project.
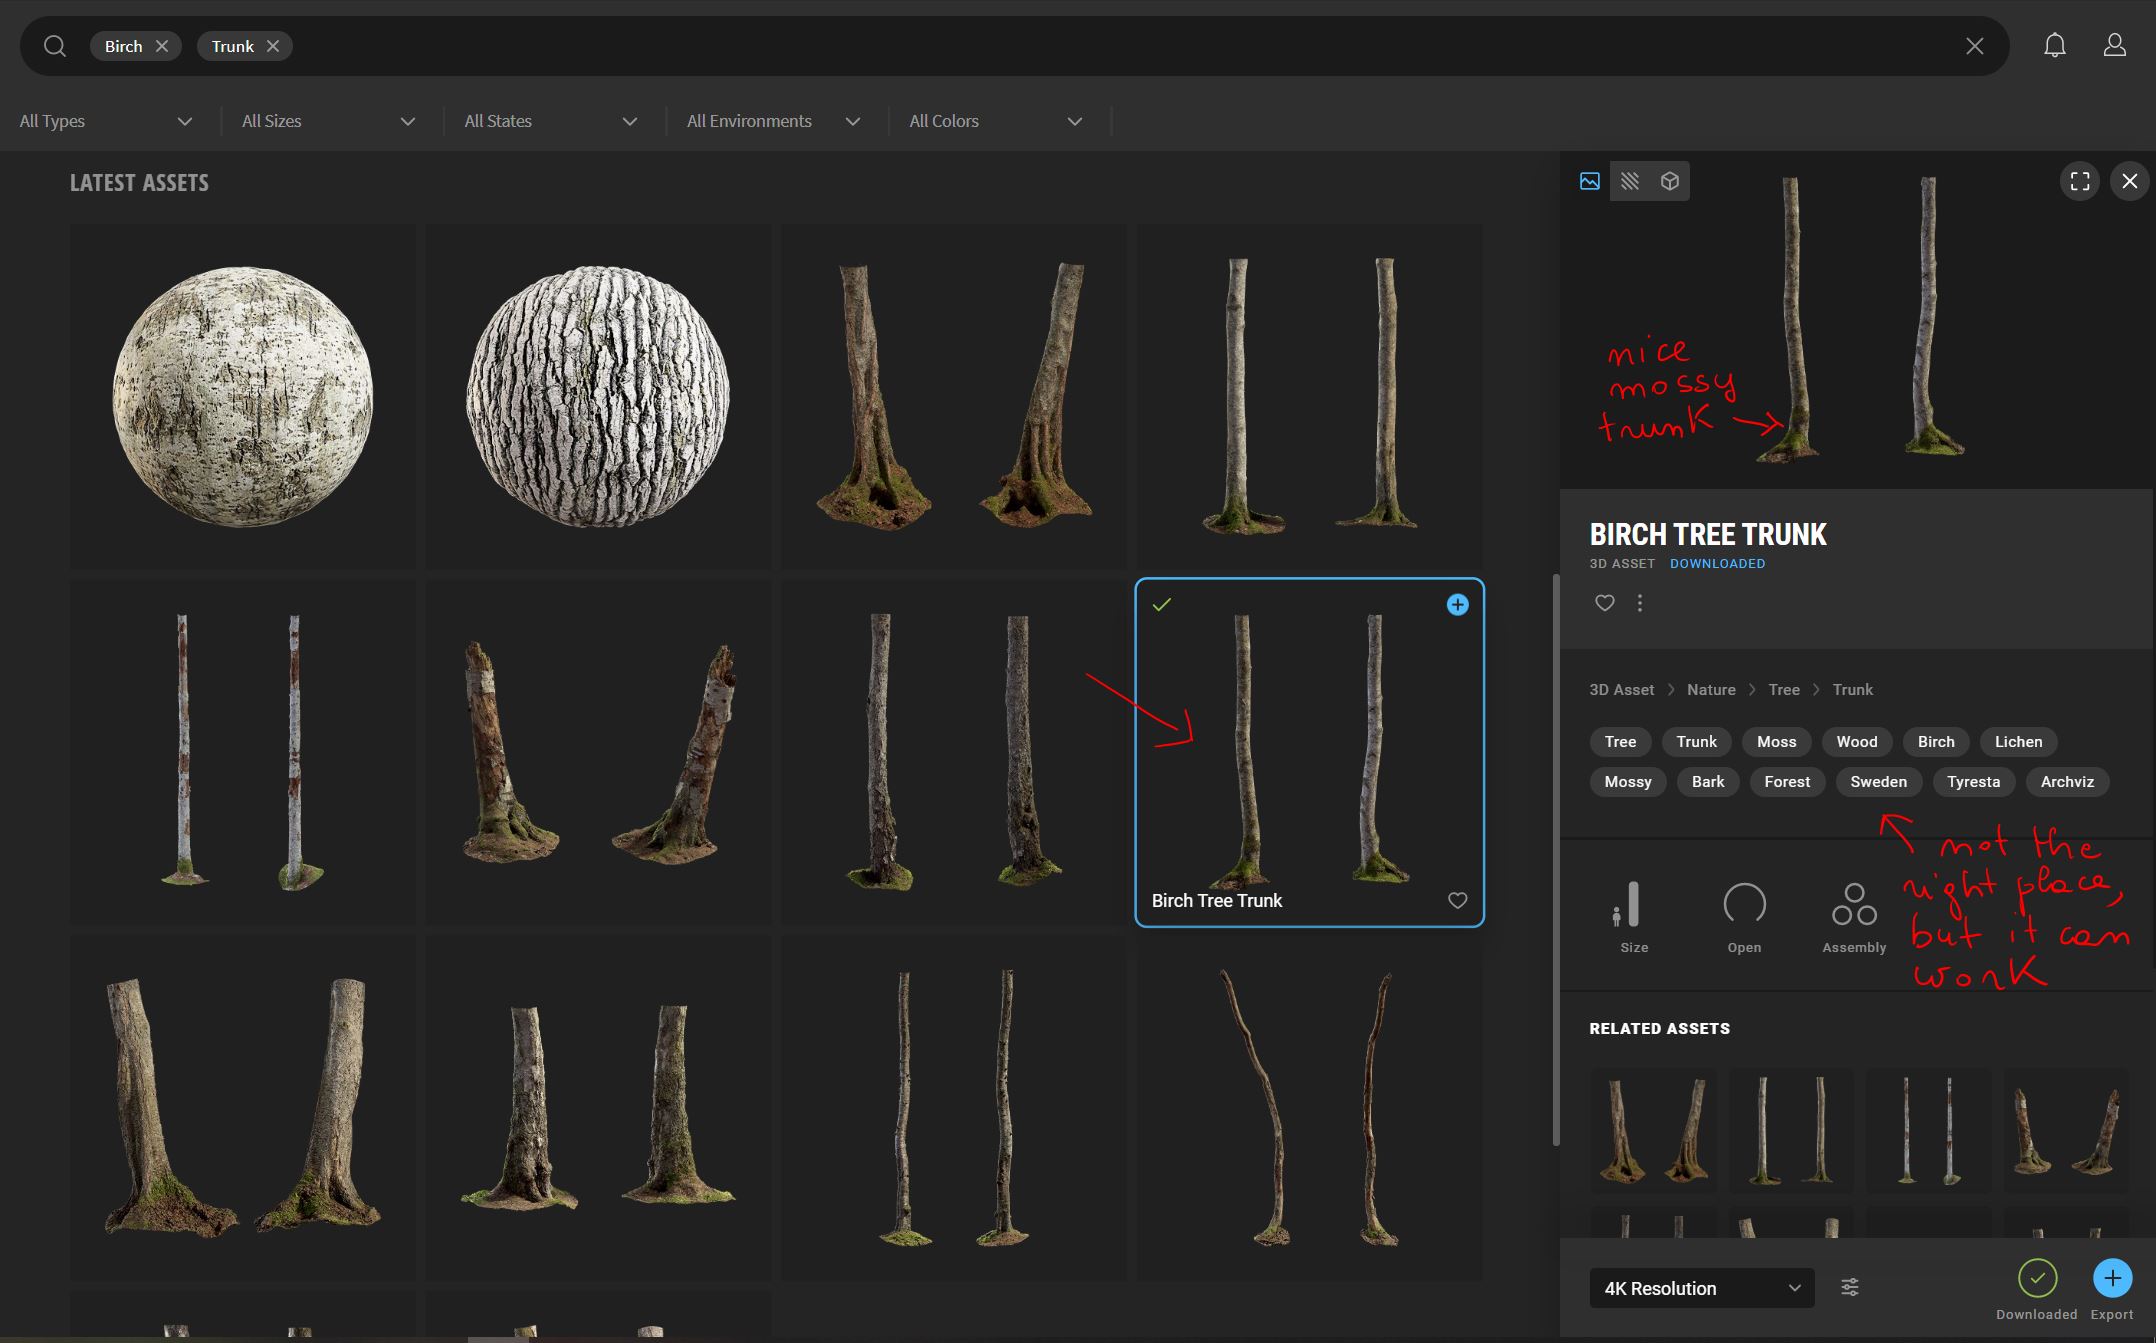
So, I checked on Pl@ntnet the characteristics of this birch and, in particular, the differences with respect to the common birch (Betula pendula) I can easily observe where I live. Once, I had an idea of the tree, I’ve started to look on Quixel Megascans for a good mossy photoscanned birch trunk. I wanted to scan one myself, but I didn’t find anything suitable near me. The one I’ve found on Megascan it’s also not exactly the right tree (it’s scanned in Sweden), but it has some nice moss on the bottom (ideal for representing a tree in a humid region) and can, in my opinion, provide enough realism also in this case.
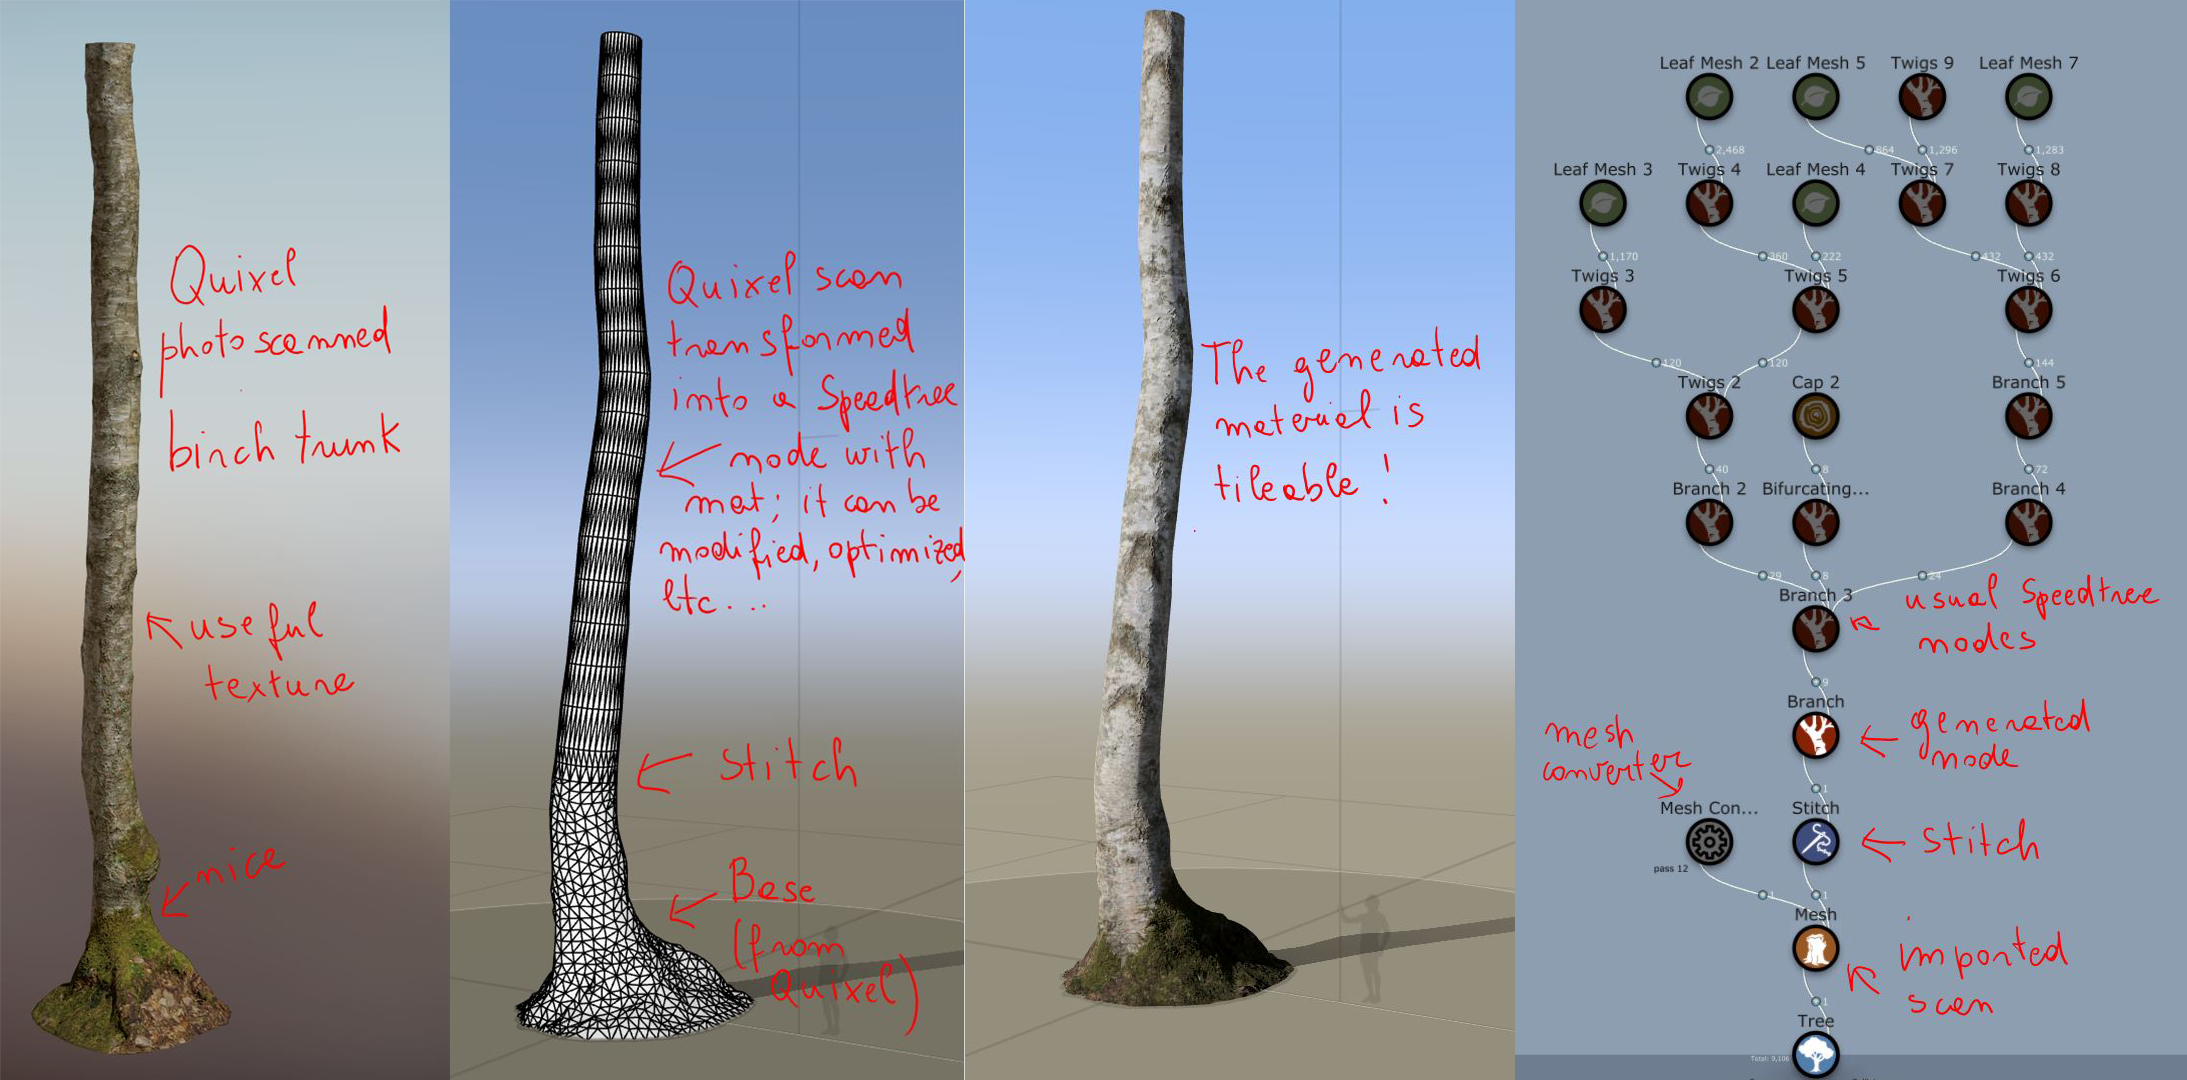
So, after downloading the assets (Mesh LODs and textures), I’ve imported them in SpeedTree as a material with a Mesh associated and added a mesh node to my scene

As I don’t want to have all these triangles for such a simple straight trunk and, most important, I want to generate a material I can use on the branches and trunks of different shapes, I’ve decided to add a mesh converter. In this case, I like a lot the mossy bottom part of the tree, so I’ve decided to keep it.

For this goal, I set up the Mesh converter node selecting a nice part of the trunk that can be used for a tileable texture. I worked a little on the clearance (it didn’t need a lot of setup as the trunk is simple, almost straight) and spent some time finding the mask that gives a good result for the tiling. There is no fixed rule for the blending, in my opinion, I just play with the parameters (blend range and mask) until I’m satisfied. Then, I did a “convert in place”. This operation leaves the bottom of the tree intact, generates a stitch and transforms the part used for extracting the material into a regular SpeedTree Branch node with the generated material applied. The result looks like in this screenshot:
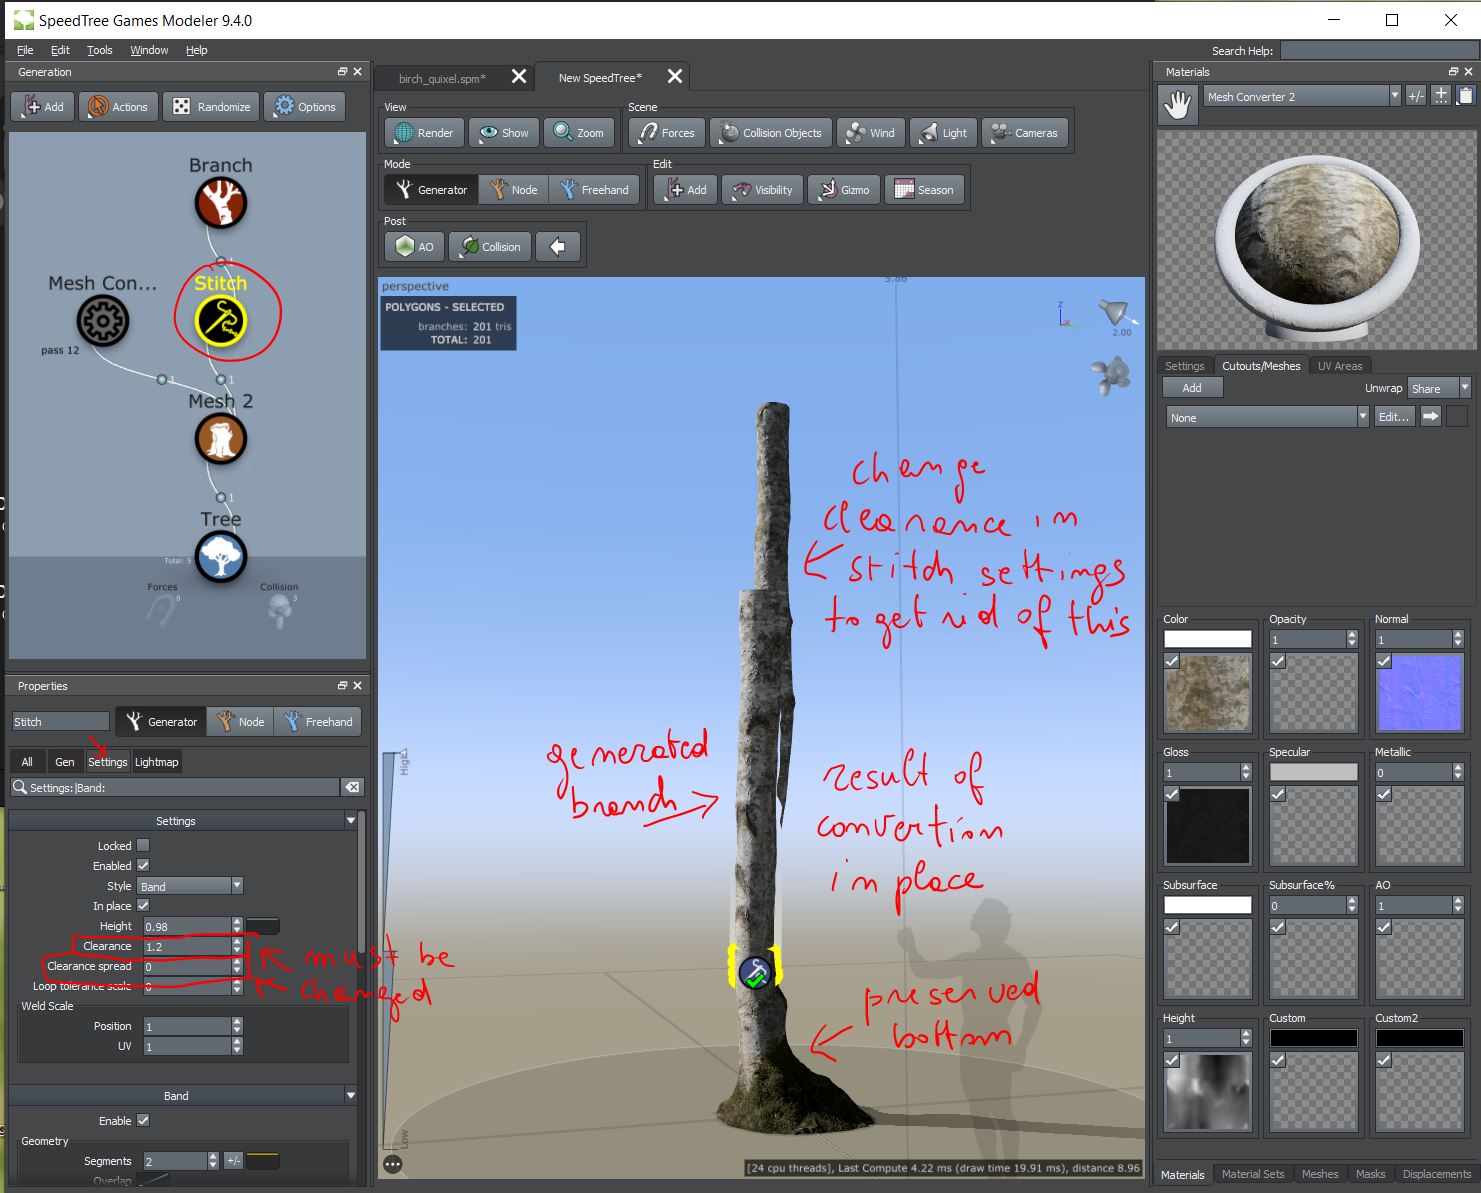
In order to get rid of the redundant geometry left by the converter, one should change the clearence and/or the clearence spread in the setting of the stitch node.
I’ve changed those parameters and then I worked on the shape of branch node to make it as long and curvy I wanted. As the generated mesh it’s a normal SpeedTree node, I was also able to change its resolution parameters and make it low-poly with respect to the original photoscanned trunk.
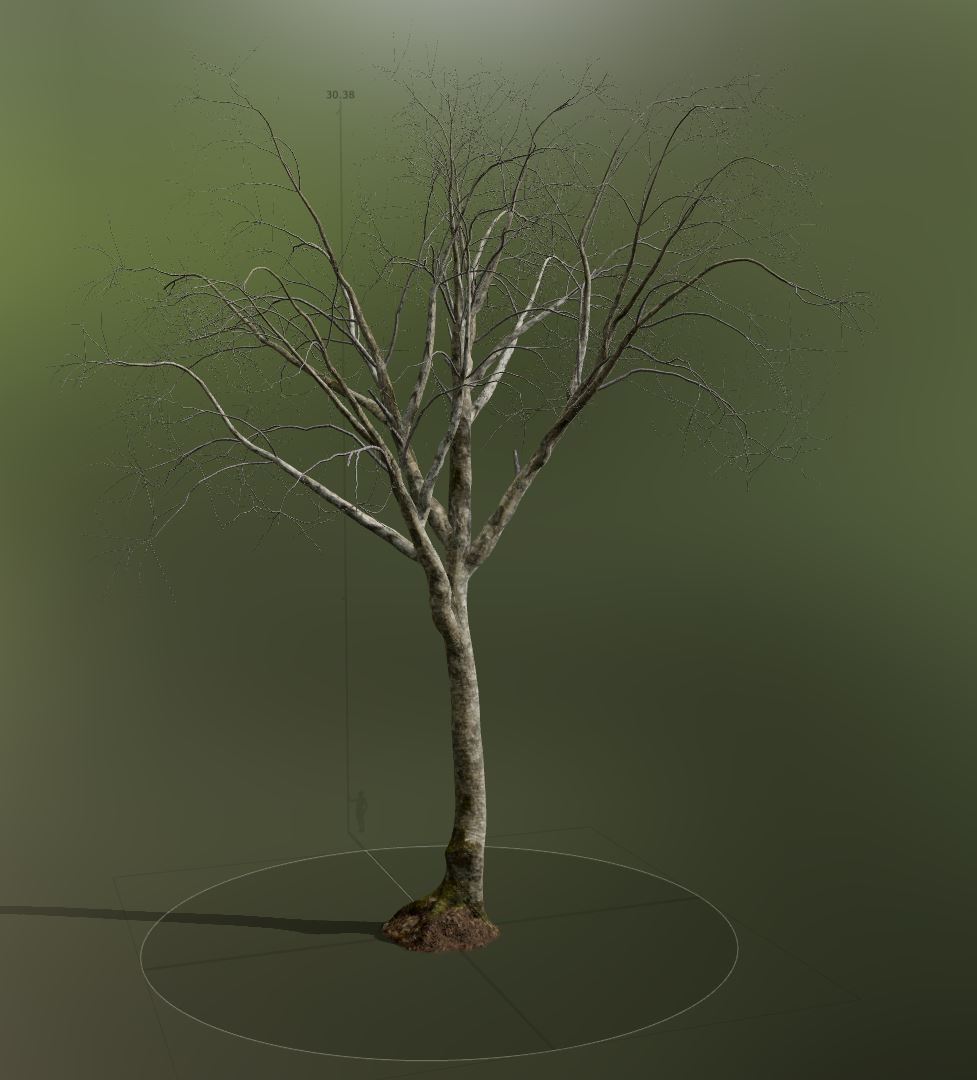
After this point, the procedure of creating the tree is back to the procedure I already used with SpeedTree 8. So, I added the branches and added to them the material SpeedTree generated for me from the Quixel asset.
Now, only the leaves are left. I used the birch leaves textures that SpeedTree gave as sample for SpeedTree 8 UE4 subscription, but I could also look for them in other atlas (Quixel, Substance, etc) or scan them myself (however, in this moment of the year birches have no leaves yet). The advantage of SpeedTree sample textures is that they came already with different textures following the seasons allowing me to set up the look of tree in all 4 seasons and transitions between them which isn’t really necessary for my project, but extremely fun (I actually have a lot of fun doing trees, bushes and flowers, I find it relaxing).
When setting up the leaves material, I put a lot attention in variations (they add realism to the tree) and season transitions. About the latter’s, in nature things don’t change abruptly but gradually: for example, already at the end of spring, a part of the leaves at the top of the tree (the ones that are more exposed to sun light) will start to become yellow while the bottom ones are still green or a few leaves already start to fall down in summer.
Another important thing about leaves is to check their phyllotaxis arrangement and put the correct input in the SpeedTree node. In this case, leaves are alternating.
A small optimization trick while setting up leaves is to make them slightly bigger than in reality.
Here the final result