Photogrammetry Breakdown: Preparing Textures
See all parts of this breakdown: Photogrammetry: making Nanite meshes for UE5
In this step we will prepare textures to import in Unreal. Right now we have the original photo scanned mesh, lets’ call it Mesh.fbx, it’s de-lit base color texture Mesh_delit.tif and the re-topologized mesh SM_Mesh.fbx with new UVs prepared for import in Unreal. We will first create the base color texture that matches the new mesh (bake), then, optionally, create a Normal and Roughness textures.
But before the baking begins we will open our 2 meshes in Maya together and check two things: they should be in the same place in the world (otherwise the bake will fail of course), and they should be at least 1m large or more. If the meshes are too small (few centimeters large), the tiny high-poly triangles become microscopic and that will cause issues with normals both for baking and for Unreal. Even if the mesh is small IRL you need to scale it bigger. (you can scale it back in your level in Unreal). Finally we will freeze the transforms so rotation is 0 and scale is 1.
For baking the base color texture to the new mesh and its UVs we use xNormal. Specify Mesh.fbx as “High definition mesh”, Mesh_delit.tif as its “base texture to bake” and SM_Mesh.fbx as “Low definition mesh”. Then in the Baking options tab specify the output file, here we will call it Mesh_xn.tga, check “Bake base texture” and hit Generate maps button. This will give you the base color texture you can import in Unreal, usually we rename it in something like T_Mesh_D.tga (D for Difuse).

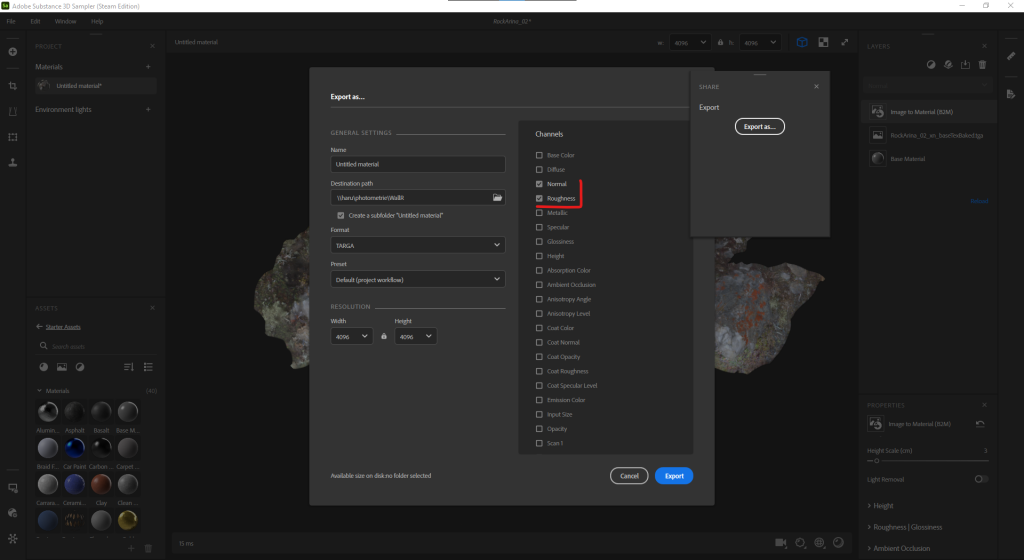
For creating optional roughness and normal maps we use Substance Alchemist. Simply drag the T_Mesh_D.tga into that program and it will generate various textures using its AI based algorithms. We will export roughness and normal maps, then for our Unreal material, we will add the roughness as alfa channel of the base color texture in Photoshop. In this case we will save the combined texture as a new file called T_Mesh_DR.tga (R for Roughness). We will call the normal map T_Mesh_N.tga
Alchemist also allows you to do the de-lighting, but it doesn’t take the mesh shape into account. It’s totally possible to use it for simple cases, for example when the mesh is very flat. But with more complex meshes and lighting scenarios the Agisoft De-Lighter works better. In case when we want to use Alchemist for de-lighting we will skip the De-Lighter step, using xNormal to bake the original photo scanned texture, then give it to the Alchemist and produce also the base color in there.

Next: Importing in UE5
