Braids Haircut for UE4 with nHair and xGen
Recently (UE4.25) Unreal Engine added the possibility to use alembic hair. It’s a revolutionary feature, still beta, but designated to radically change the procedure of creating characters to use with the engine. Thanks to the fact that finally Autodesk offers Maya Indie also in my country, I was able to test this beautiful new feature that Epic has added to its engine.
This little tutorial is about how to create a braid in Maya using nHair and xGen plugins. All I did was to follow this Daryl Obert’s video tutorial and adapt it to my needs. I’m writing this blog post essentially to memorize what I have learned, as I’m a total noob in the matter of creating hair with Maya.
The final result I got after a couple of tries is this:
Scene preparation
- Import the character and the scalp meshes into Maya;
- Make sure there are no namespaces, use the namespace editor to delete all namespaces that are eventually in the scene; according to this xGen hair tutorial, this is an important step to have xGen working correctly;
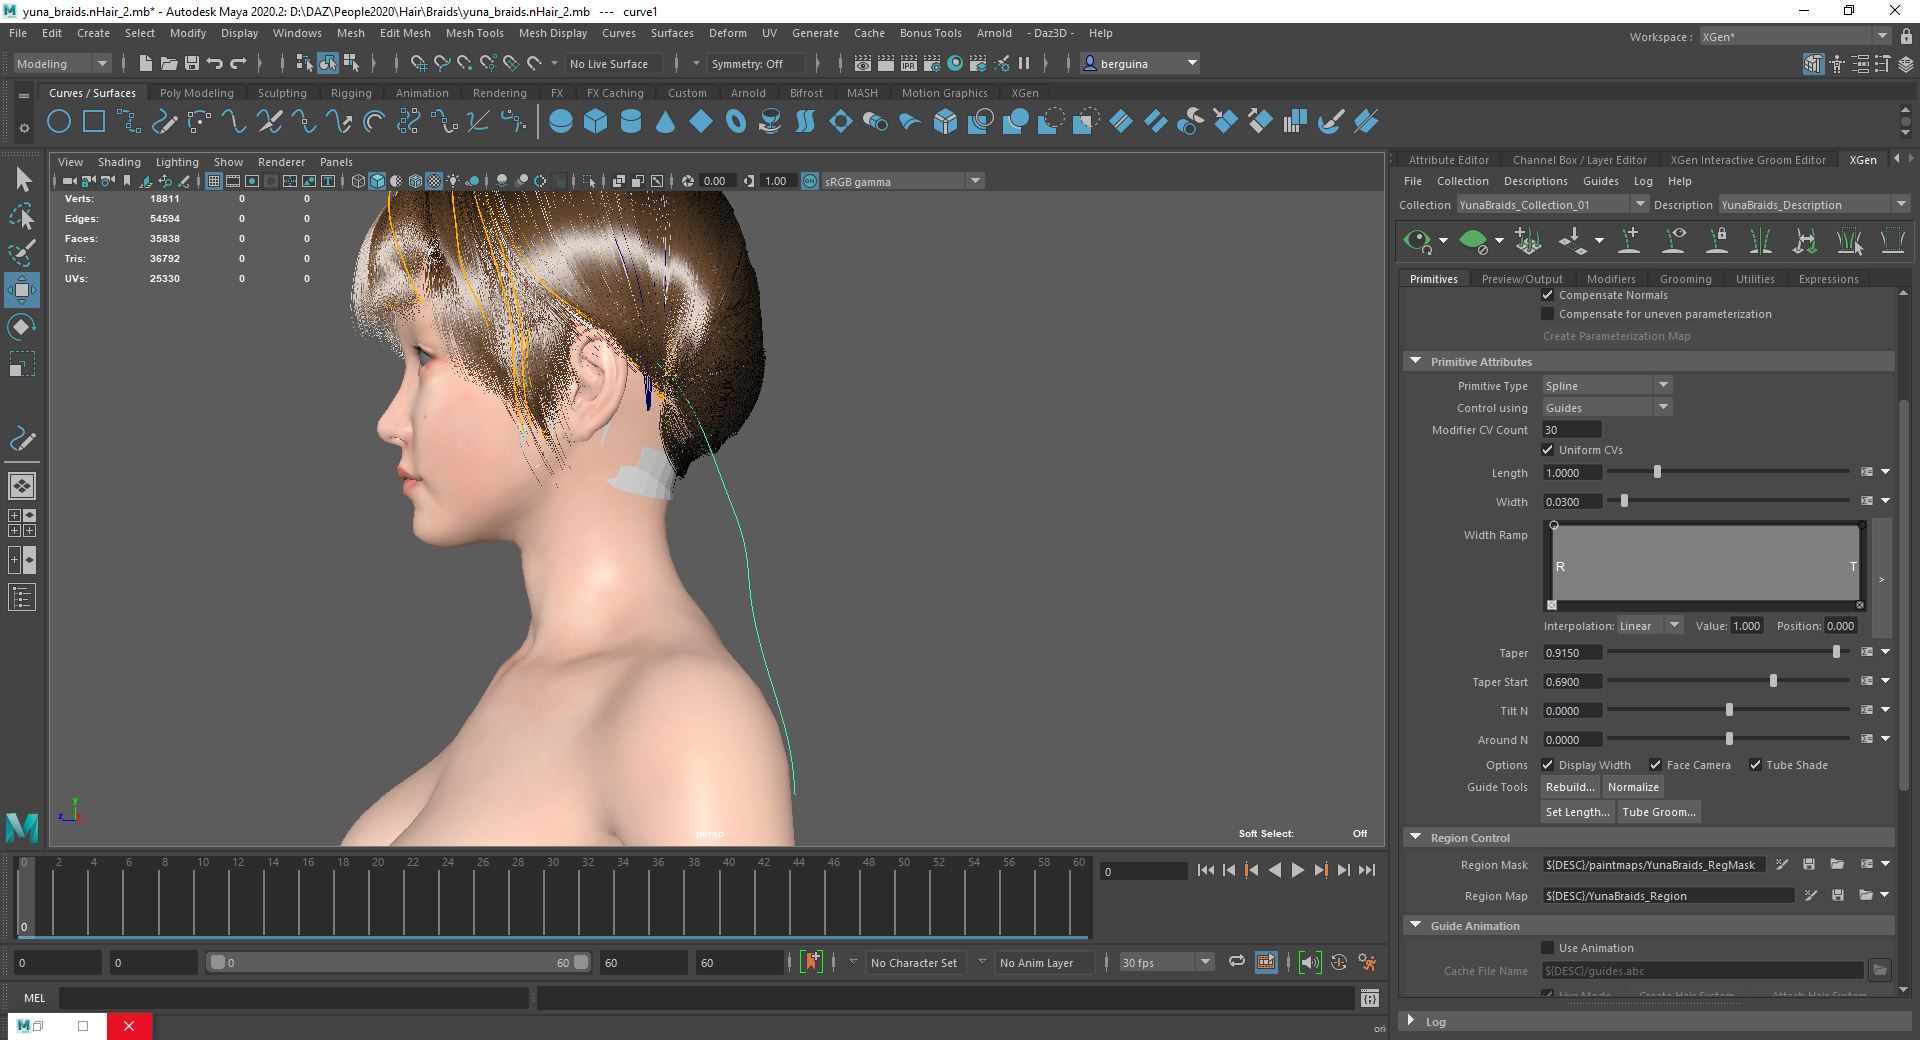
- Create an xGen collection and an xGen description for the hair that are supposed to have the braids attached, as in the picture.

Braid creation
Now I’m going to create one braid using nHair and xGen. I was really impressed how this procedure is easy and fast.
- Go in side view and take the base curve tool; draw a curve in the general direction of the braid you want to create, smooth it a couple of times to avoid having something too crazy, then rebuild it to assure that the curve points are equally spaced (30 spans is a good spans number in my experience);
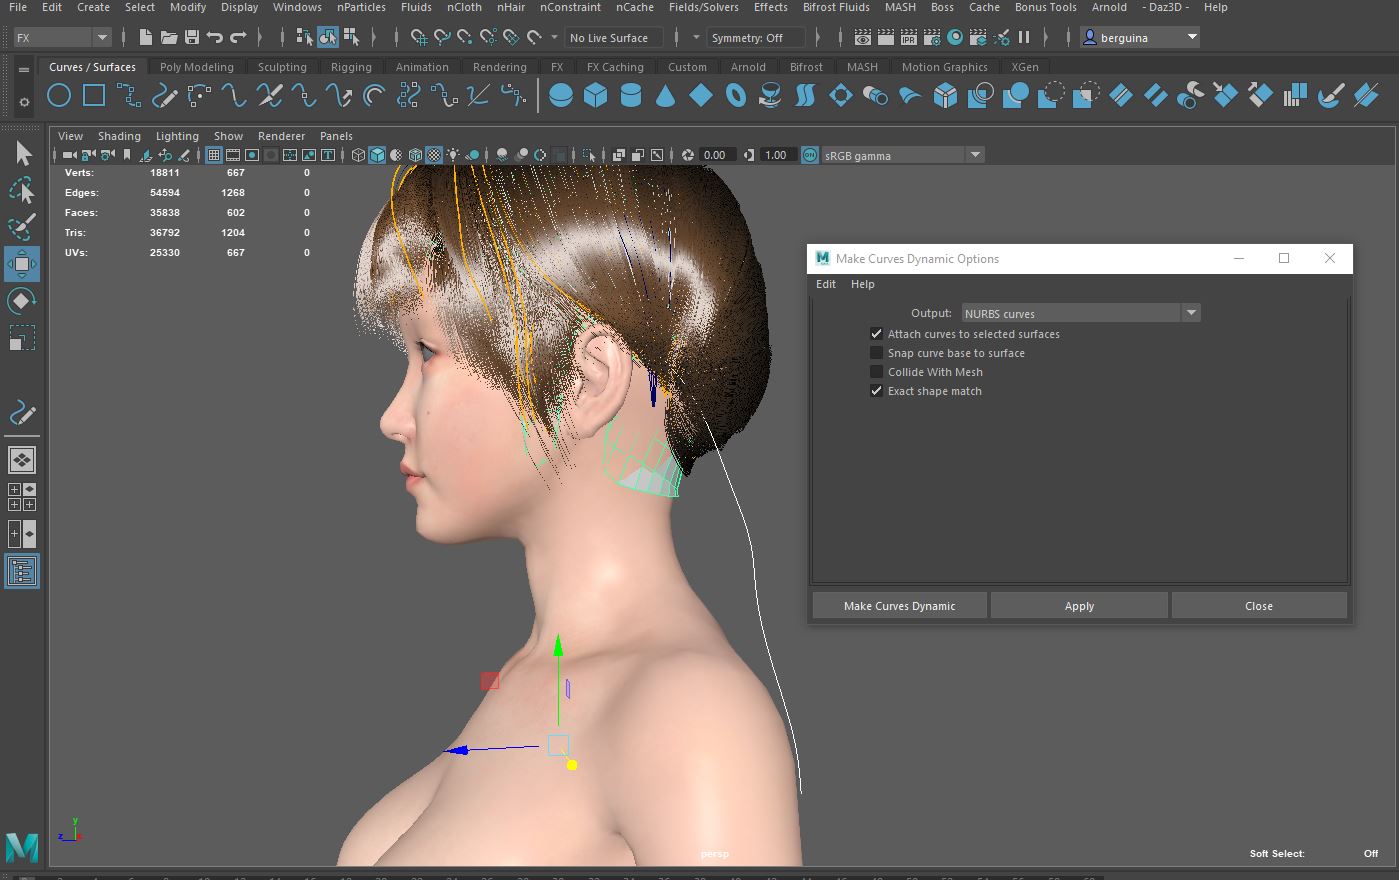
- Go in perspective mode and move the curve laterally from the center to place it where the braid should be attached (this step is not present in the tutorial I’ve followed because there the goal is a single centered braid)- see picture 2; freeze transformation of the curve for safety;
- Select the curve and the scalp mesh, go to FX menu -> nHair -> Make Selected Curve Dynamic with “Attach curves to selected surfaces” set to true; in this way the curve is attached to the surface when moving – see picture 3;
- If you hit the button “play” the curve start moving, but it doesn’t collide with the character; to have it colliding select the character and go to nCloth->Create passive collider; in this way when you click on the button “play” the curve collides with your character (this step is not really necessary for importing the braids into UE4 as the engine makes the hair simulation, but it could come useful in other cases);
- Select the hairSystem, go to the nHair menu and select “Assign paint effects brush to hair”;
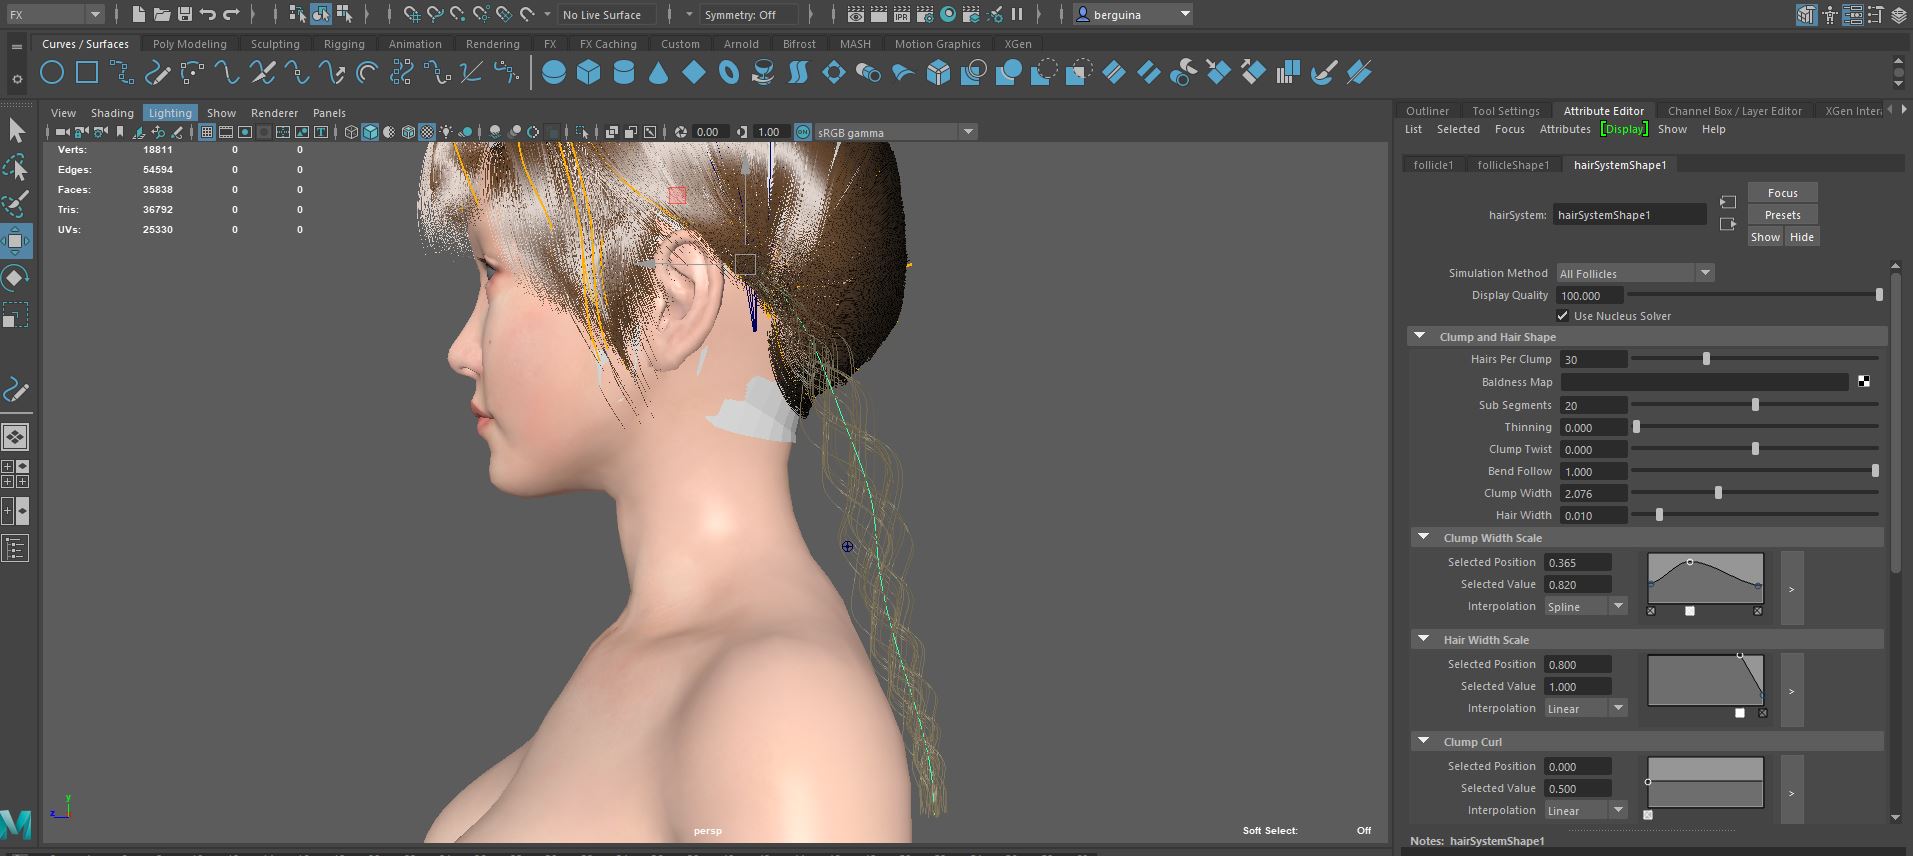
- Now select the paint effects and set the properties in the attribute editor; see picture 4 for reference;
- Select the follicles and in the attribute editor set “Braid” to true (picture 5);
- To have the braid more smooth, set “Sub Segments” to 20 (picture 6);
- Vary the “Clump width” parameter to change the form of your braid; in picture 7 I’ve reduced it to 2 to show what this does;
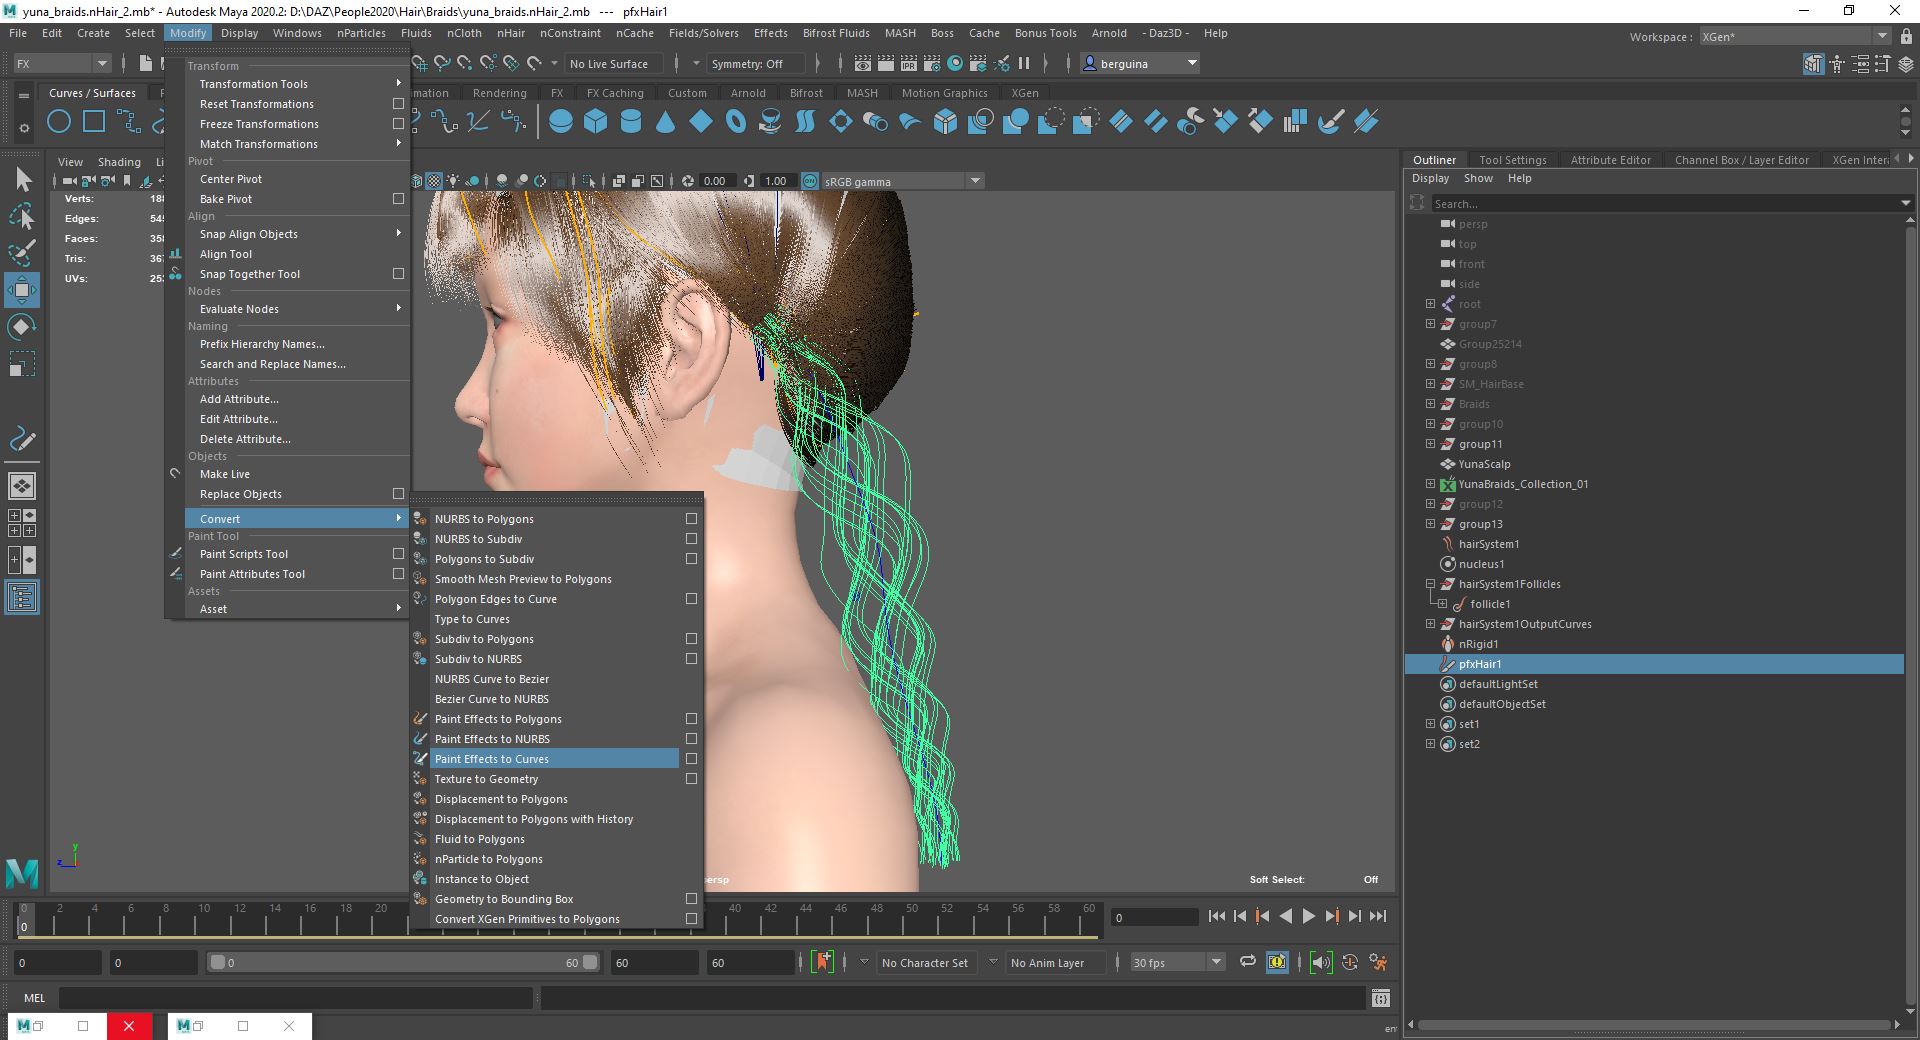
- Now we want to transform the paint effect hair into xGen hair; xGen doesn’t understand paint effects, so we take the paint effect hair and convert it into curves that can be imported into xGen as guides; in order to do this, select the paint effect hair and go to Modify -> Convert -> Paint effects to curves- see picture 8;
- Create a new description for the braids in your xGen collection, in this way you can have different parameters then the rest of the hair. Use the “Curves to guides” utility to import the curves as guides;
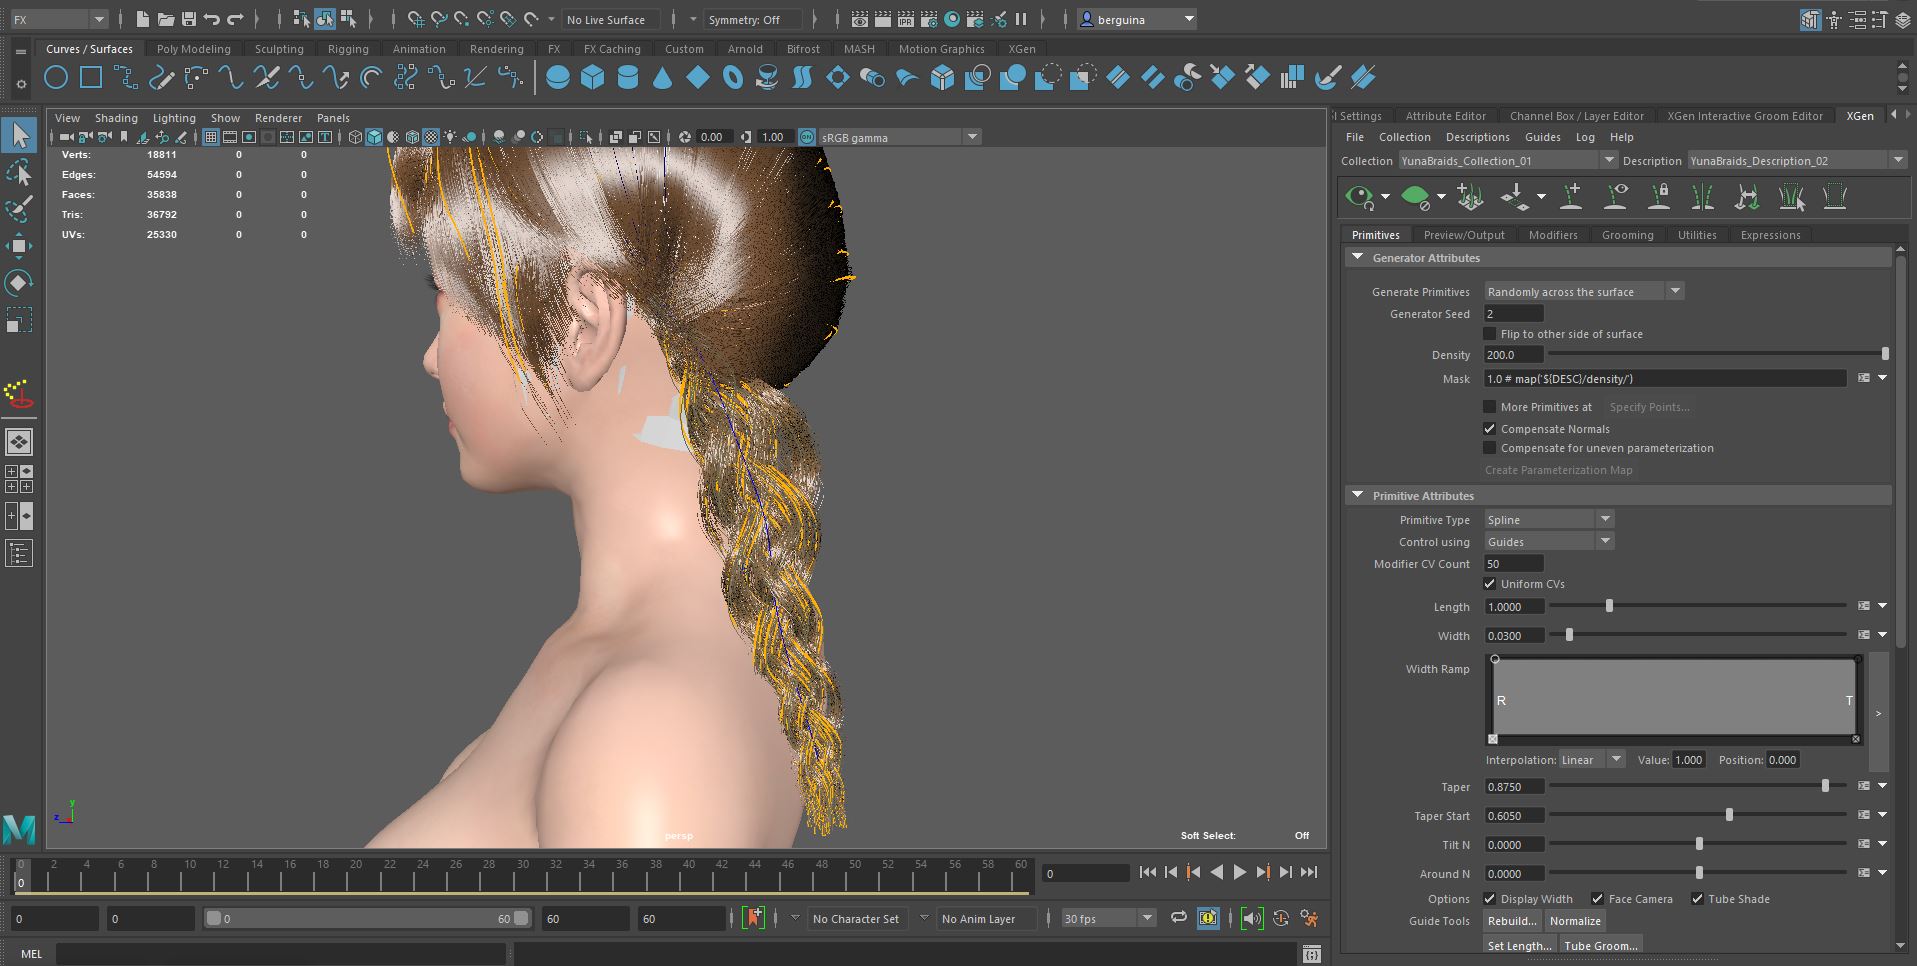
- In the primitive section of the xGen description, you need a pretty high density (200 in my case) and Modifier CV Count (50 in my case) to have the hair looking as a realistic braid (picture 9); that’s why I’ve separated the braid description from the rest;
- Setup you own modifier (noise, cut, clumping) to make the braid look more realistic;
- Select the 2 description and convert them into XGen interactive grooming in order to export the cache and import it in UE4 as explained in the UE4 documentation.