How to get rid of joint local rotation axis in Maya
Problem: joints orientation looking good in Maya, but when imported to Unreal local rotation became zero (world aligned).
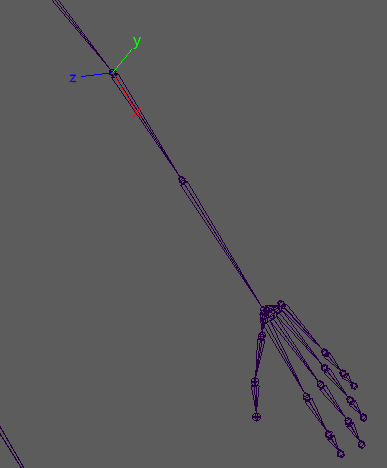
It’s probably related to the fact that both joint orient and rotate axis are set.
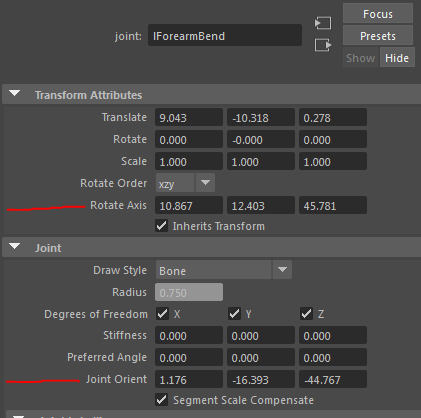
Reorienting joints using cometJointOrient tool removes rotation axis, so joint local axis looks the same in Maya and Unreal. Unfortunately, cometJointOrien also recalculates joint orientation from scratch, so original orientation will be lost. Is there a way to somehow “bake” rotate axis into joint orient, i.e. set rotate axis to zero and modify joint orient to restore original orientation?
In fact, there is a way, found looking in cometJointOrient source. First, select all joints you want to cleanup, then run this script:
joint -e -zso ;
makeIdentity -apply true ;
Result:
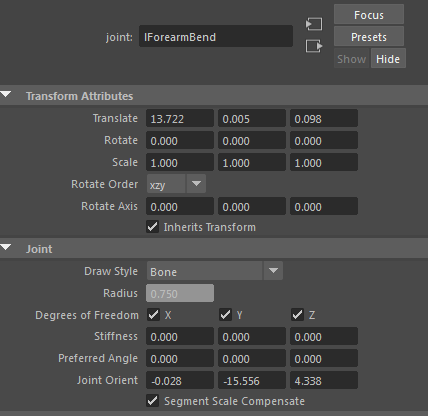

Looks same as before, rotate axis is zero, and now it will also rotate the same way in UE and Maya.
Hello guys,
Could you share a list of joints that need fixing?
Thanks,
Pavlo
We just fix them all
I have a question about getting rid of joint local rotation axis in maya. https://imgur.com/a/hUNH5 when I fixed local rotation axis as your tip, skinning was broken. how do i fix this problem?
Duplicate mesh ans skeleton, fix the copy, bind skin on the copy, transfer weights from the original
Thank you for replying, btw what does ‘transfer weights’ mean? do you mean ‘ Skin – Copy Skin Weights’?
yep
Would you please tell me ‘Copy Skin Weights’ option? I used ‘Surface Association – UV space’ then, pJCM was broken. 🙁https://imgur.com/a/eIpmI , https://imgur.com/a/Czp1J
closest component, one to one should work
oh and for the morphs you should copy them too. export them from the original then import on the copy.
Would you please help me again? https://imgur.com/a/4FQQ9 When I used ‘Skin – Copy Skin Weights – option : closest component, one to one’, Genesis 8 female mesh was disappeared. I’ve got no clue 🙁
Sorry,Never mind this. I solved this problem. btw Thank you so much.
Hello Stan!
I’ve succeeded in reorienting joints, also it looks fine in UE4!
But I don’t know what to do for animations.
Whenever I Import animations into UE4, the skin being distorted.
im already fighting with this for a week.
stuck on copying morphs, it doesnt work for me.
plus skinning gone somehow off on her legs
can someone pls record a video tutorial?
pls
Same here, if you figure it out please come back and share 🙂