Photogrammetry Breakdown: Importing in UE5
See all parts of this breakdown: Photogrammetry: making Nanite meshes for UE5
That’s the last step of our photogrammetry workflow. At this point we have the mesh to import SM_Mesh.fbx and either its base color texture T_Mesh_D.tga or it’s color-roughness combined texture and the normal map (T_Mesh_DR.tga and T_Mesh_N.tga).
First we’ll import the mesh. Don’t forget to check the Build Nanite and uncheck Build Lightmap UVs.
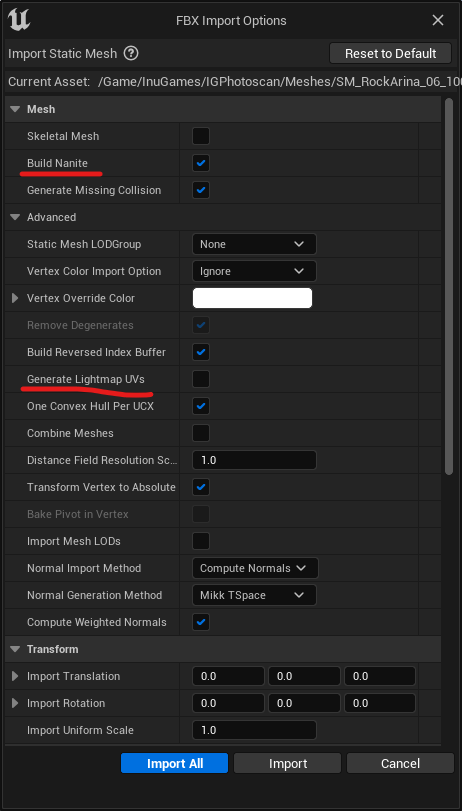
Mesh import dialog
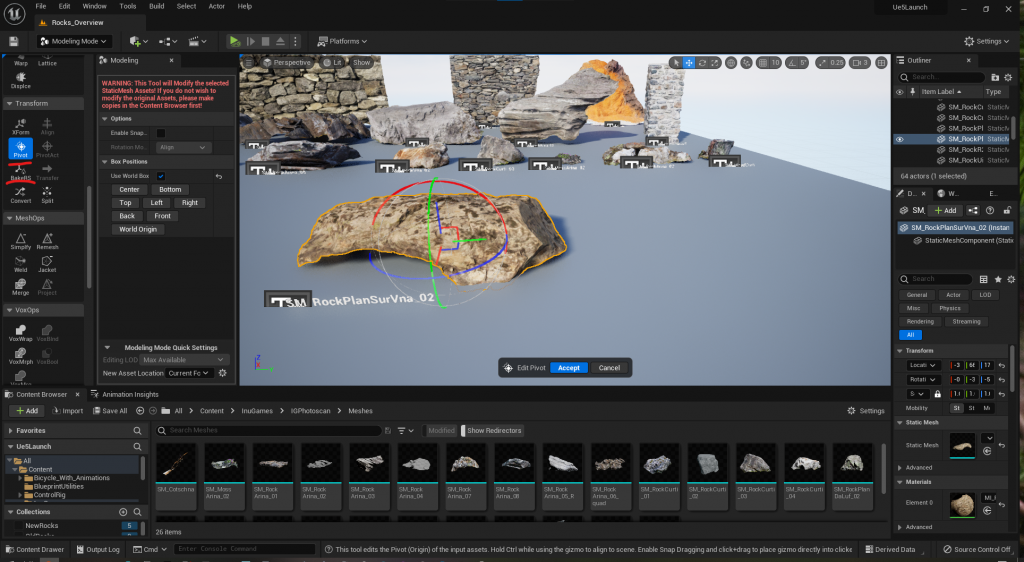
We will then use Modeling Tools plugin to modify the pivot and sometimes the scale, but remember, the Nanite mesh should be pretty big. If your mesh is too small it will become partly black because the Unreal couldn’t correctly calculate the normals for the micro triangles.
Next step is to import the textures, this is pretty straight forward, just drag them into the content browser. Check if Unreal recognized the normal map correctly.
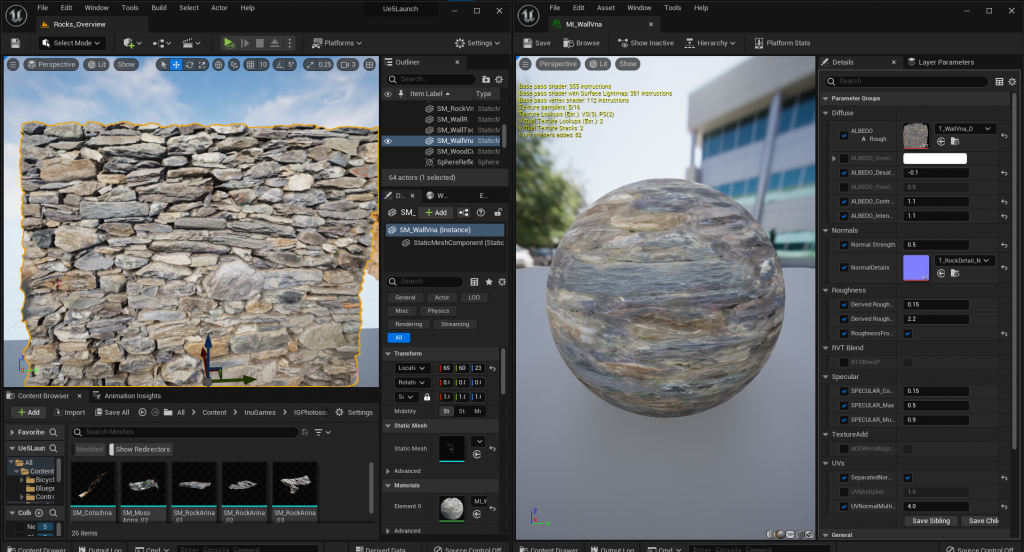
Final step is to create the material. We have a master material (inspired by Epic’s examples) which allows us to manipulate color, normals and roughness. We’ll create a new instance, setup it with our imported textures and modify various parameters. Then we set that material as default material of the mesh and voila, it’s done!