Marvelous Designer To UE-4 Tips And Tricks
It’s relatively easy to create some nice clothes in Marvelous Designer. However, they are very high-poly for a game engine.
So, you may want to retopologize them, but, at the same time, to preserve all nice features Marvelous offers, first, in my opinion, the UV. In fact, in Marvelous, you create your cloth using a sewing pattern as you would in real world. That sewing pattern becomes the UV of your mesh and, in order to have your texture to behave in presence of folds like a real tissue, you want to preserve those UVs.
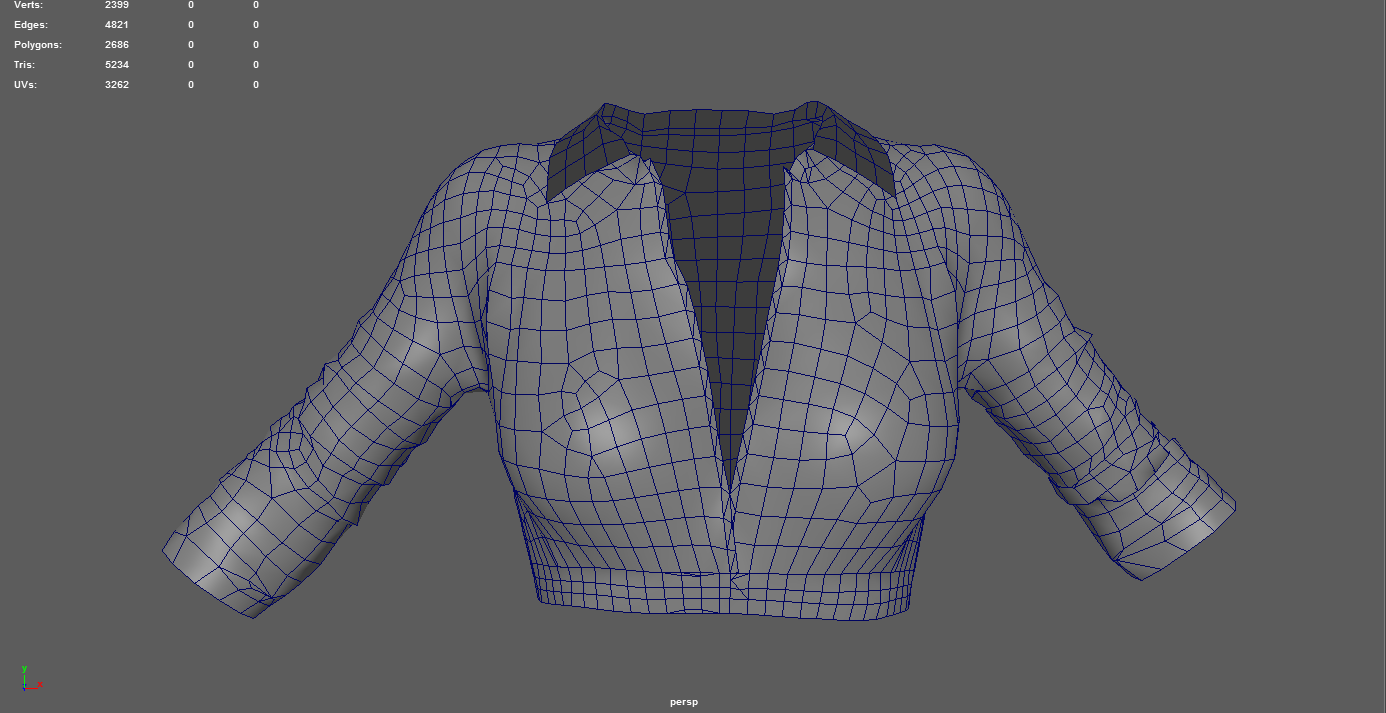
For example, here I did a shirt and I wanted the long sleeves being pushed up, so this makes a lot of folds.
I’ve obtained a quite realistic mesh, but definitively not suitable to be skinned and used in a game engine as it is. So, what to do?
Picture 1: Simulation in Marvelous Designer
I’ve looked a little on the net and found out several people use to retopologize meshes using the “quad draw” feature in Maya or the retopologize feature in Z-Brush (I don’t have Z-Brush, so I’ve only tried this once long time ago with the demo version of the program) or something similar with other software. This produces a very clean topology, however, destroy entirely the UVs and I didn’t want that.
So, I had an idea. I took the high resolution simulated cloth in Marvelous (5mm or 10mm particle distance, quads), freezed it (so the shape is fixed and would not be modified any more) and changed the particle distance to 20 mm (for some meshes also 30mm is ok, in my experience).
Then I export the high resolution mesh and the low resolution mesh and start to work in Maya. The high resolution mesh will serve to bake the normal map, the ambient occlusion map and other maps that can be useful. I usually do the baking in Substance Painter, but one can also use xNormal or any other software able to bake those textures. The low resolution mesh is a little more tricky, sometimes I can use it as it is with minor corrections, sometimes I have to work a little more. The shirt, I showed above, is one example of the second case.
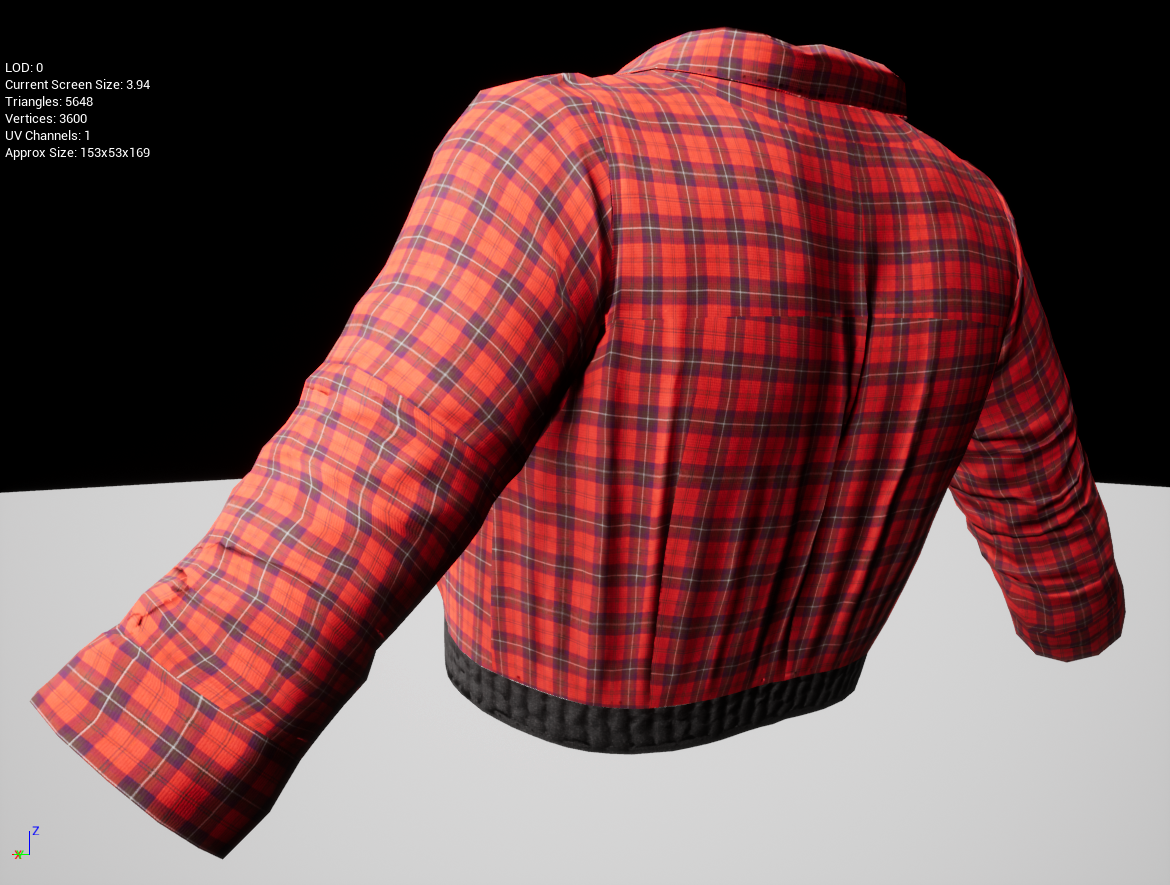
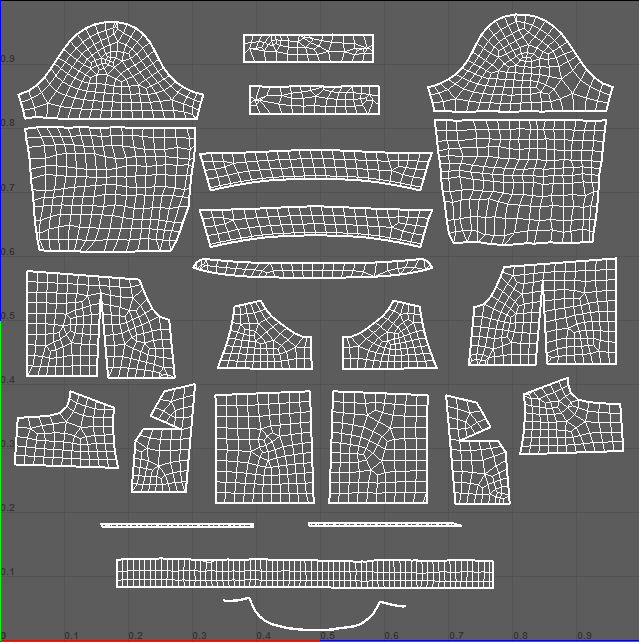
This is the low resolution mesh (20mm distance) as exported from Marvelous
Picture 2: Low resolution version of the mesh
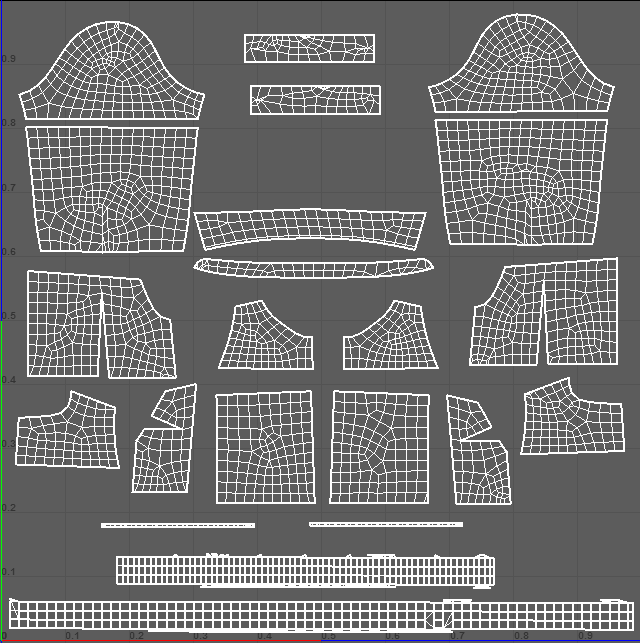
Picture 3: Uvs as exported from Marvelous, they reproduce the sewing pattern
It’s nicely low poly and has the same UVs than the pattern (compare the screenshot taken in Marvelous for the high res with the one for the UVs for the low res), but, because of how I have on purpose pushed the sleeves up, the sleeves geometry is not so clean and nice that I would like.
In prevision of this, in Marvelous I have separated using “cut and sew” the sleeves in two parts, up and down. I don’t want to modify the upper part of the sleeve, only the downer part that has a lot of folds.
So in Maya I made a cylinder with the same number of divisions as the mesh above, used conform to map it on the original and corrected a little bit manually; then I’ve transferred the UVs in order to reproduce almost the same UVs of Picture 3.
Here the result
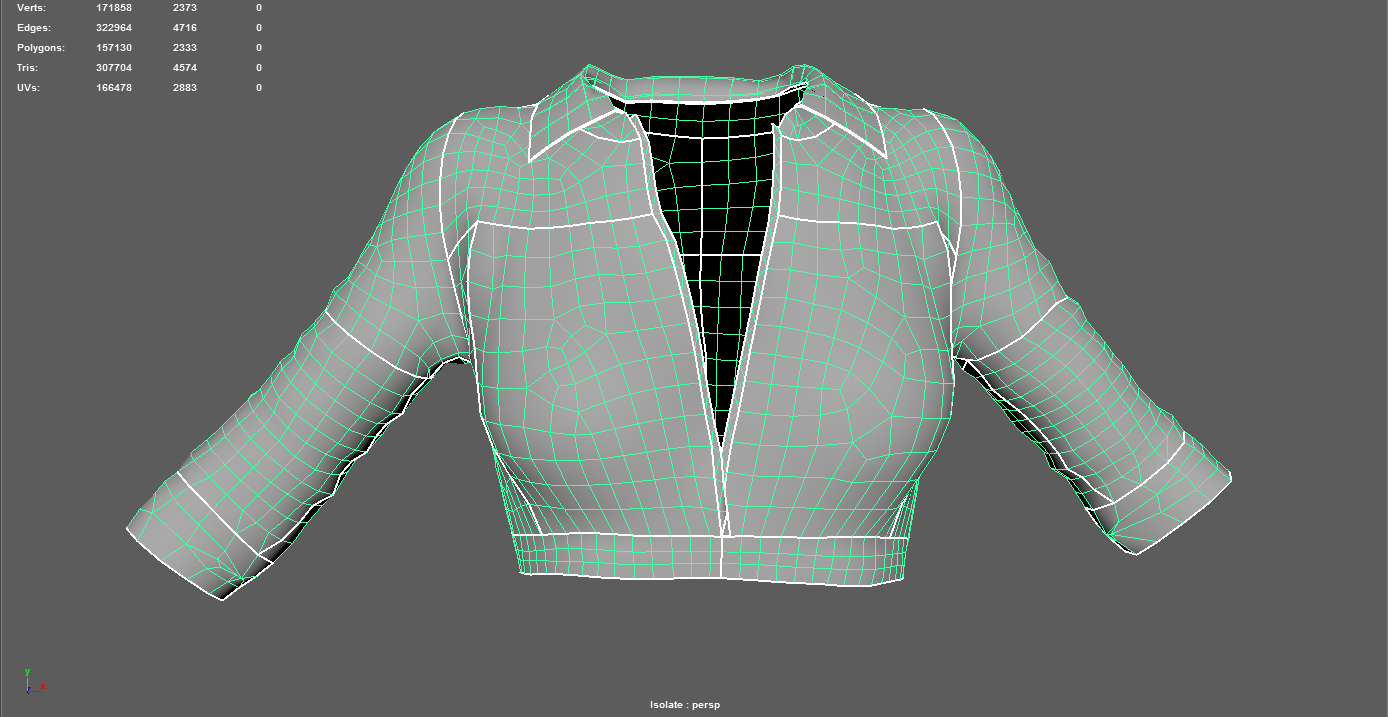
Notice that this new topology is much cleaner than the original one and the sleeves UVs are almost preserved. I’ve also doubled the collar mesh in order to give it a nice thickness, so it will look more realistic. I’ve also substituted the two meshes of the waist band with a simple cylindrical mesh (using the same approach than for the sleeves) in order to bake the normal map of the pleats on it, keeping the whole geometry clean and low poly.
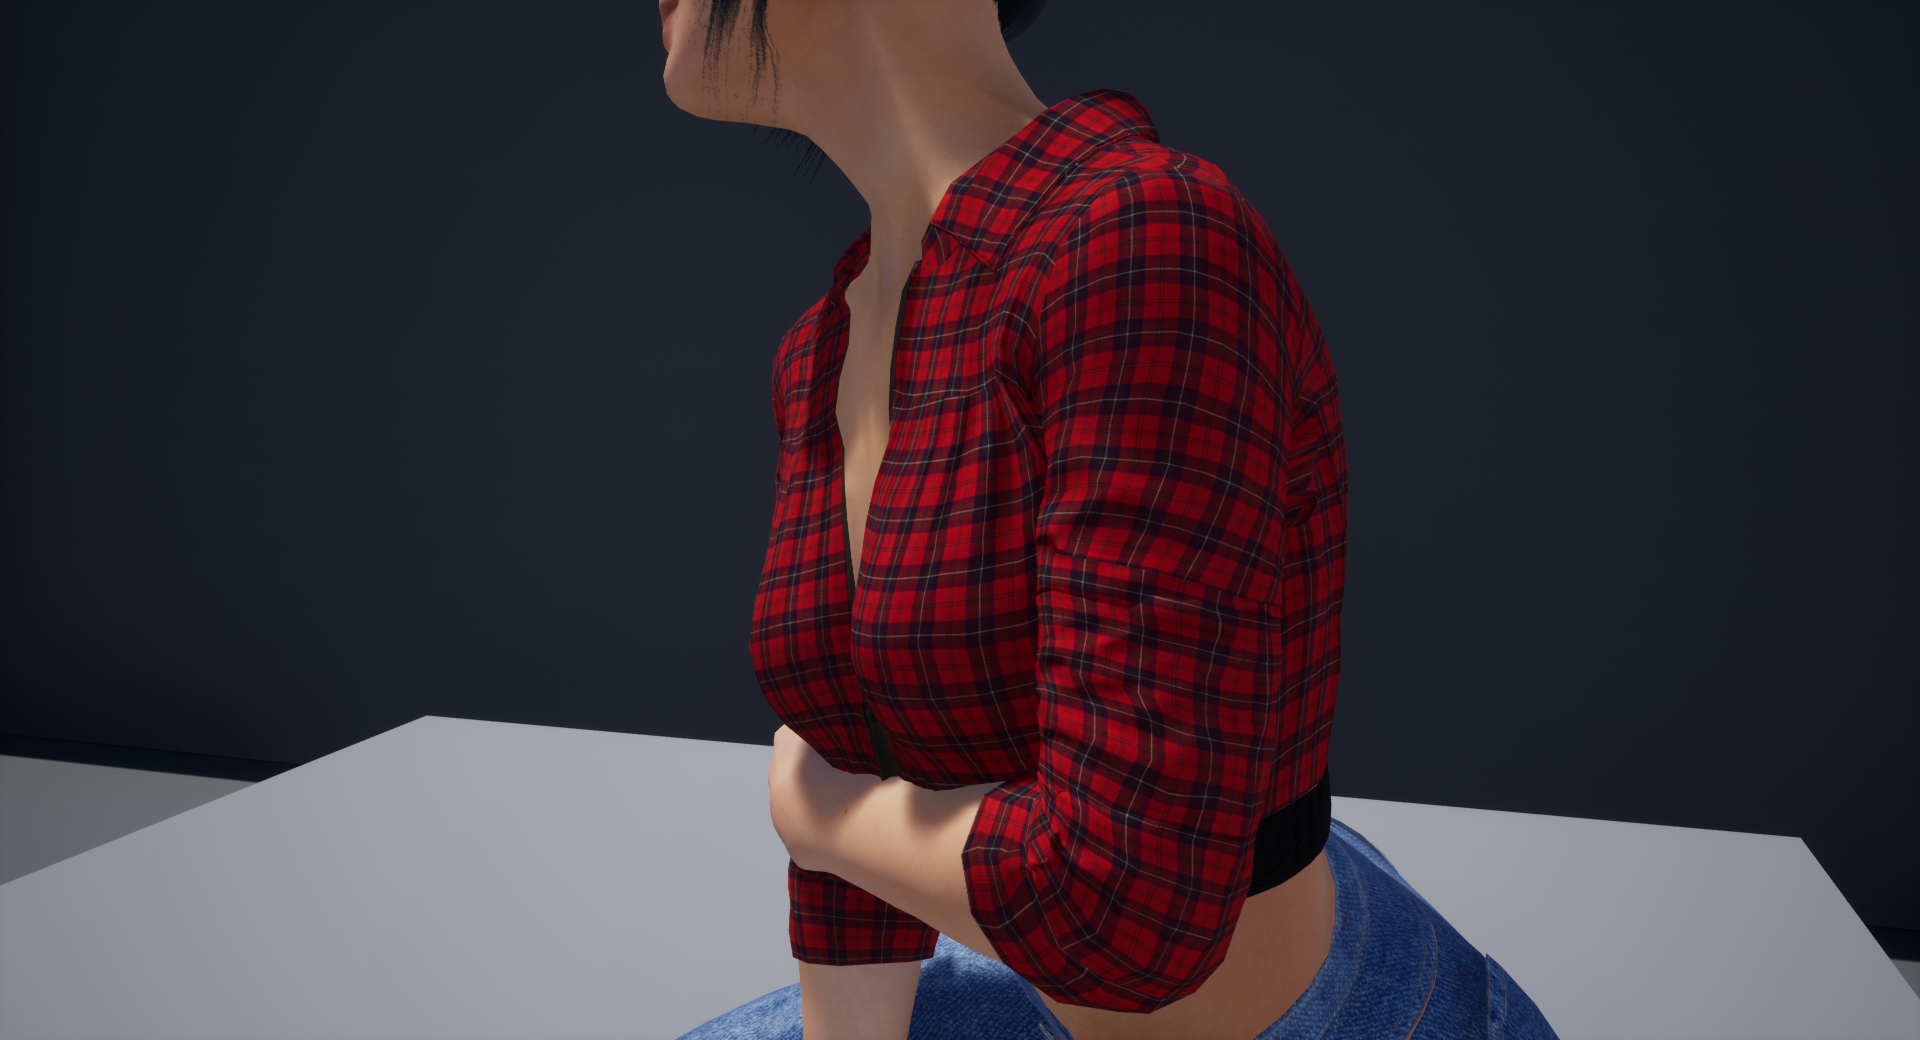
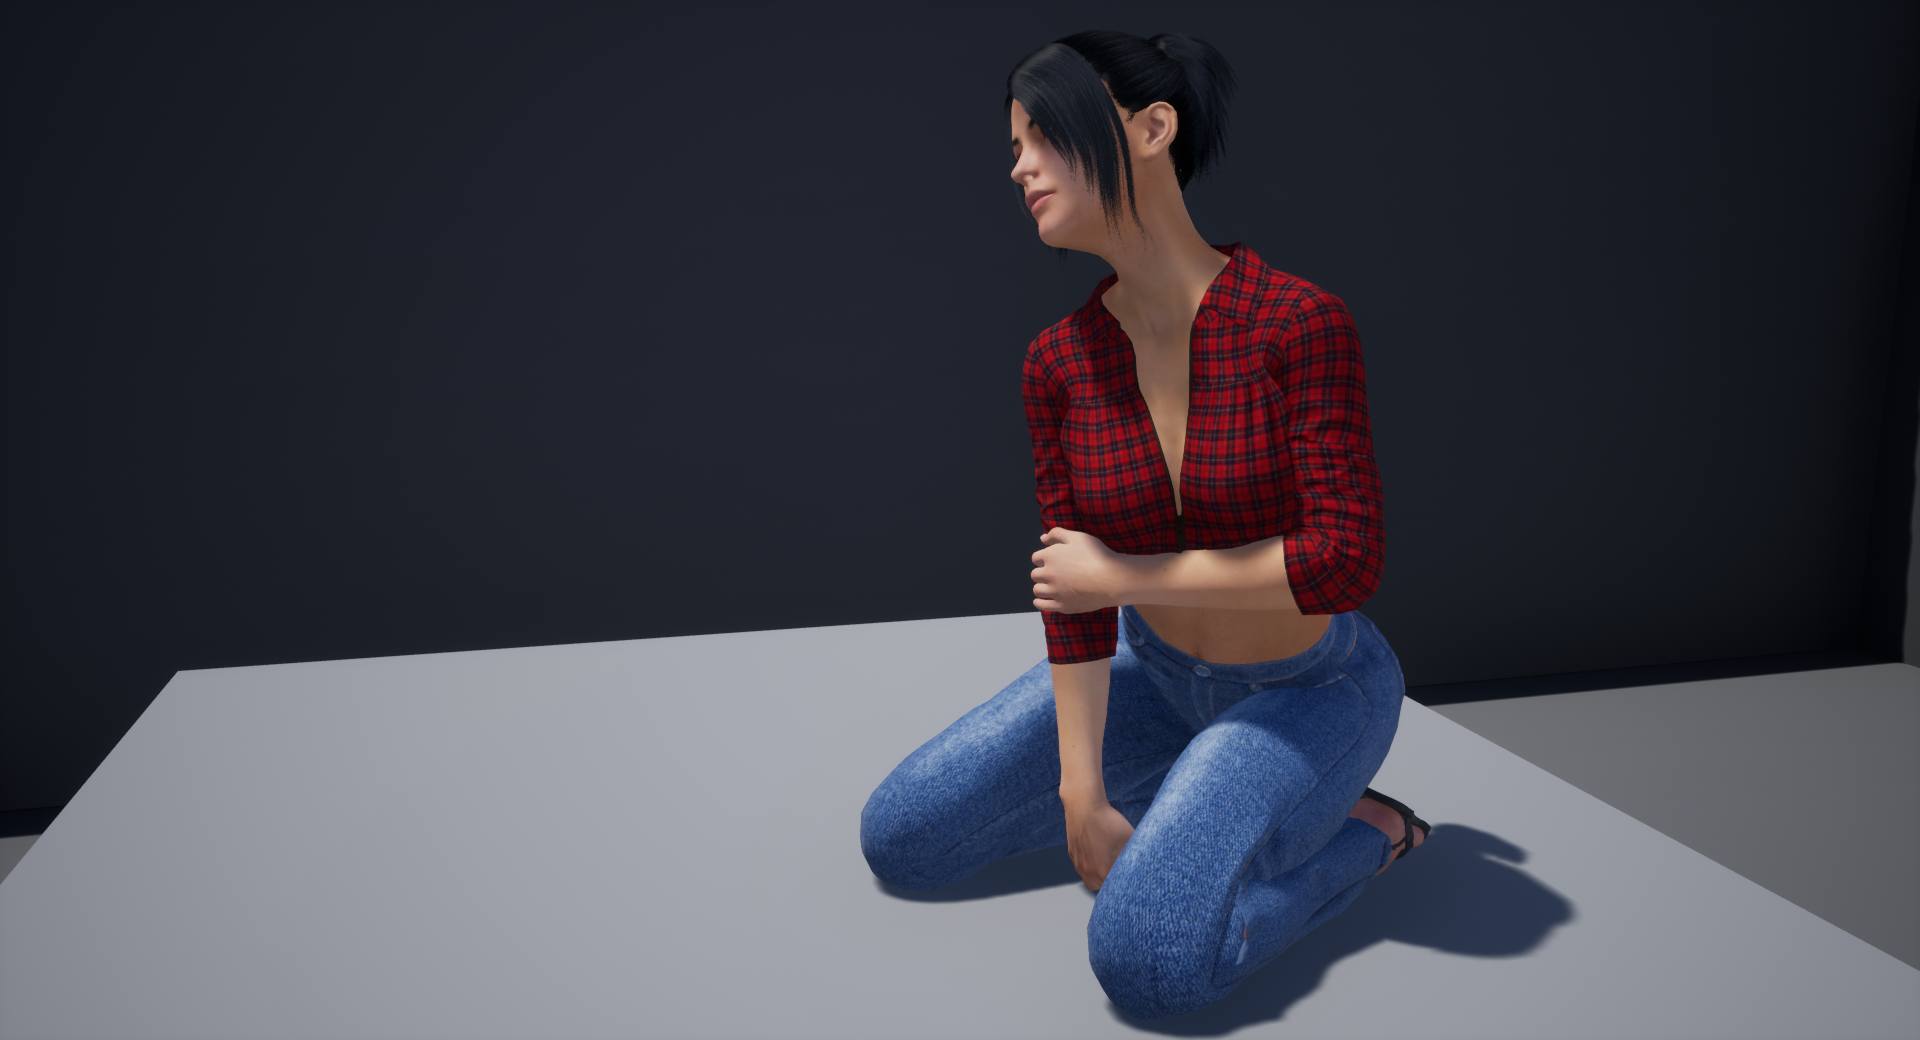
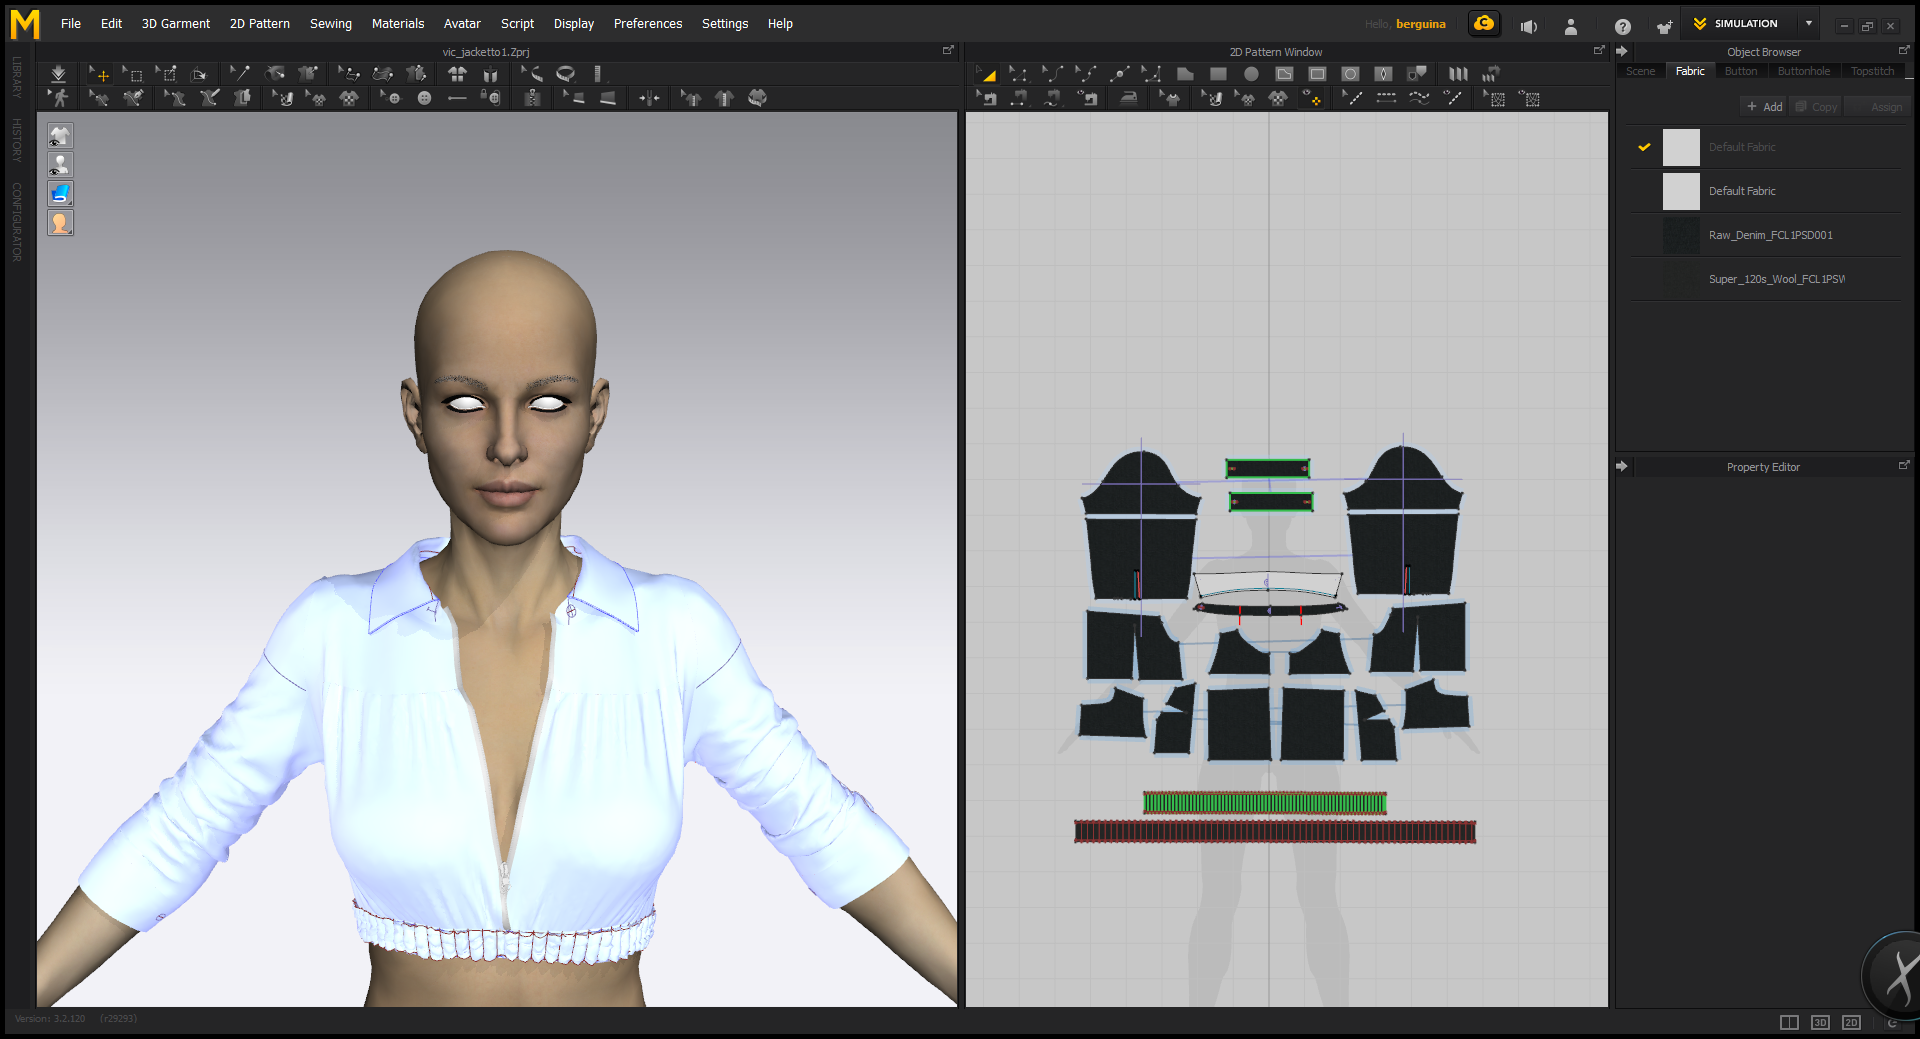
Once skinned and imported in Unreal 4 here the screenshots of the result.
Notice that the multicolored Tartan fabric is nicely distorted as it would be in a real shirt with this kind of pattern and folds, as I wanted.